
Congratulations on purchasing a drone that can do more—thanks to POISuite.
On this page, we will show you what steps need to be taken after your new DJI drone and our software package arrive. This will ensure that you are fully prepared for use.
Set-Up
You can find out how to set up and operate your drone in the quick start guides provided by DJI for the respective model.
On request, we can set up the drone for you before delivery so that it is ready for use as soon as it arrives.
Click on the image of the relevant drone model to go directly to the corresponding instructions.
-
DJI Matrice 4T
-
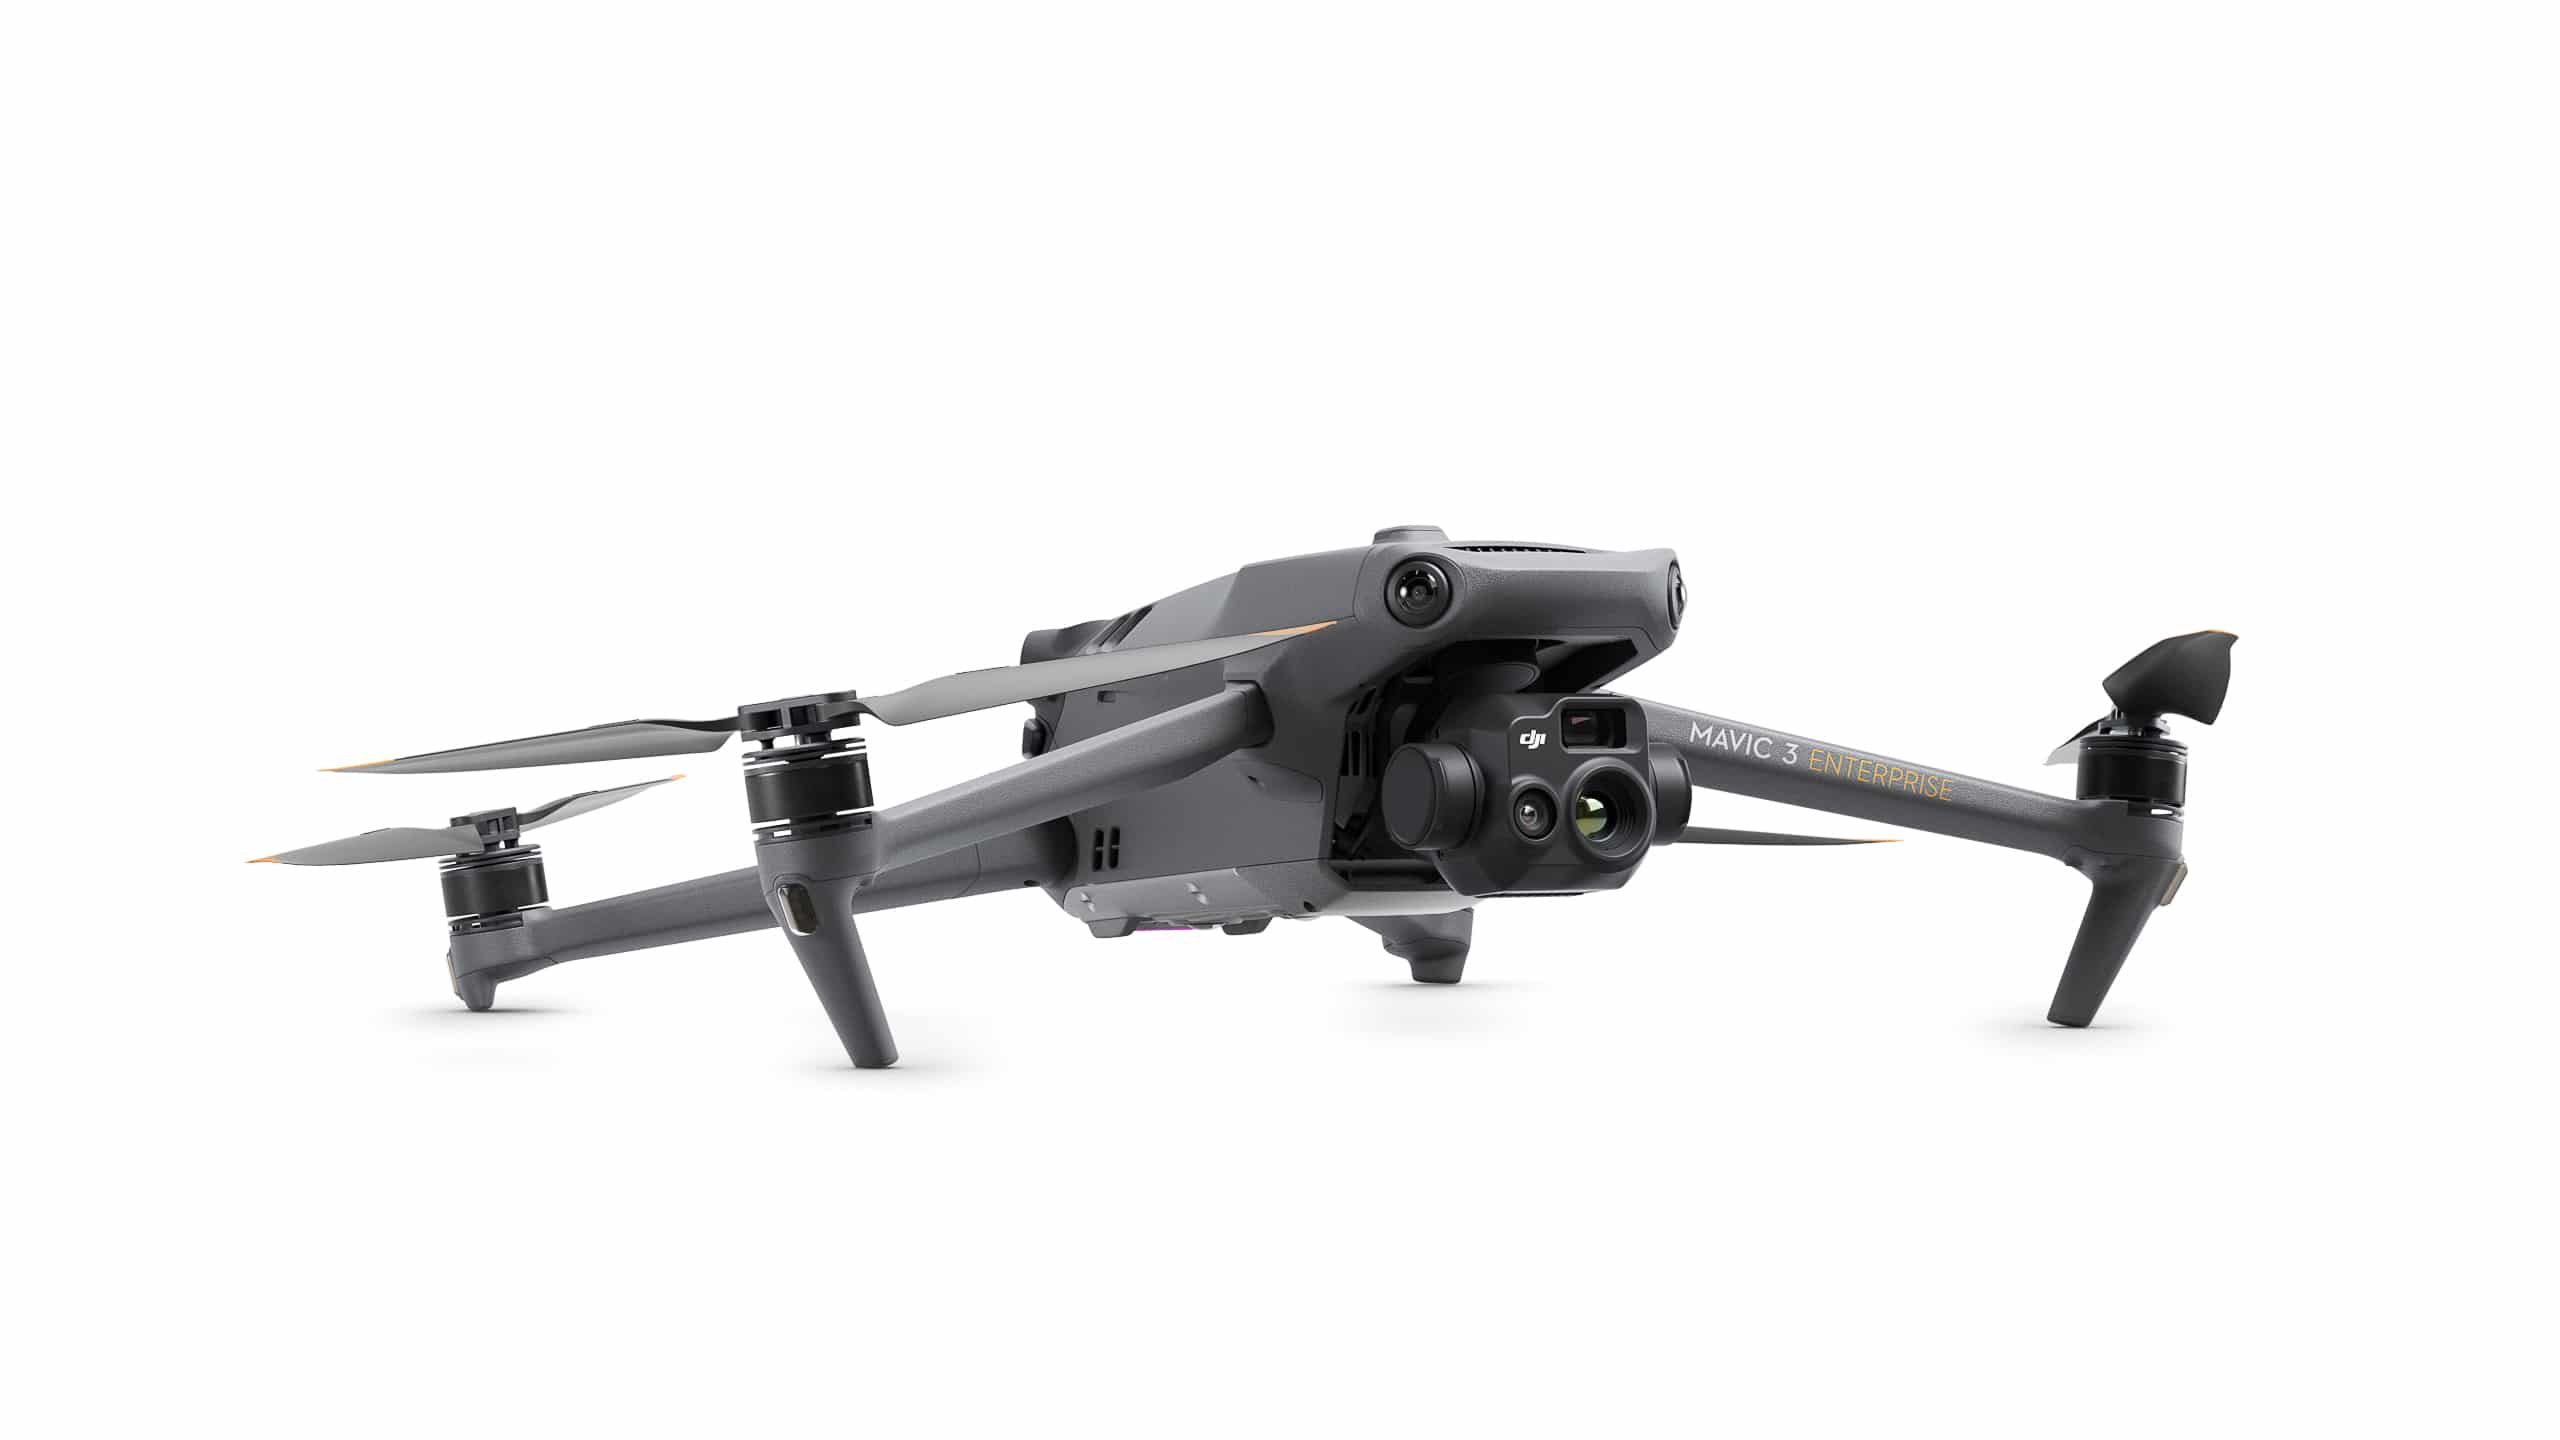
DJI Mavic 3 Enterprise T
-
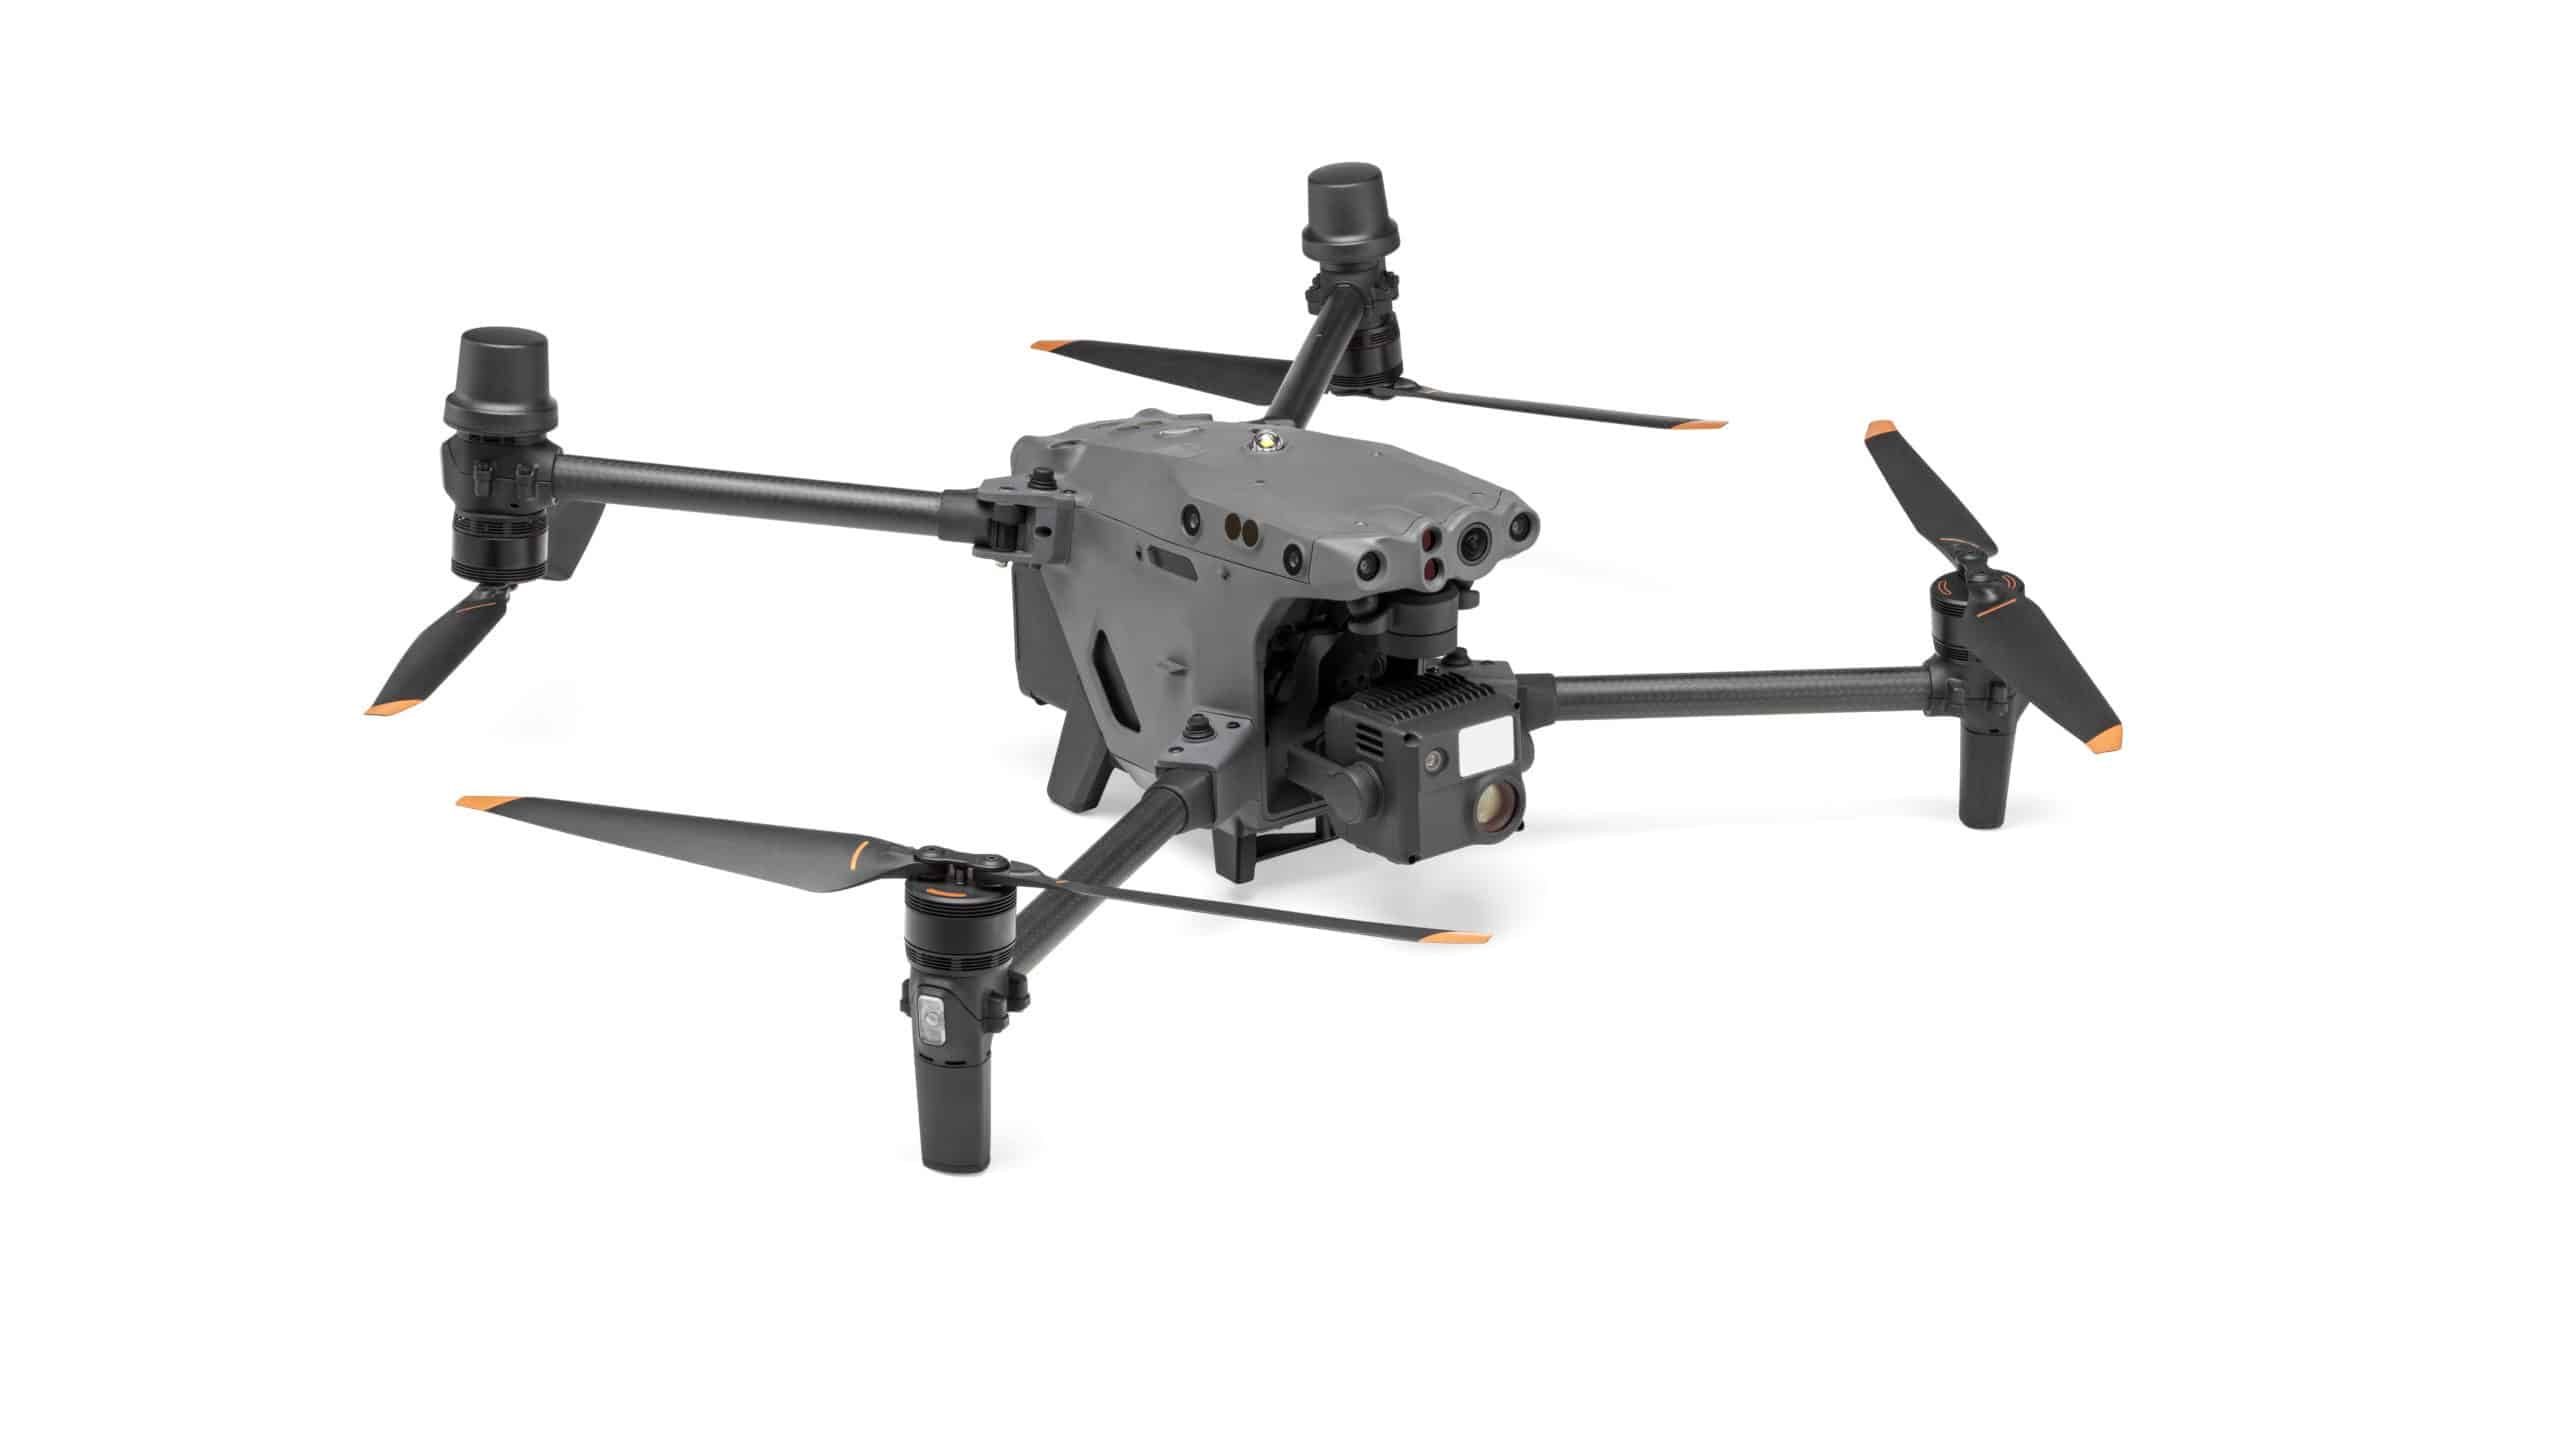
DJI Matrice 30T
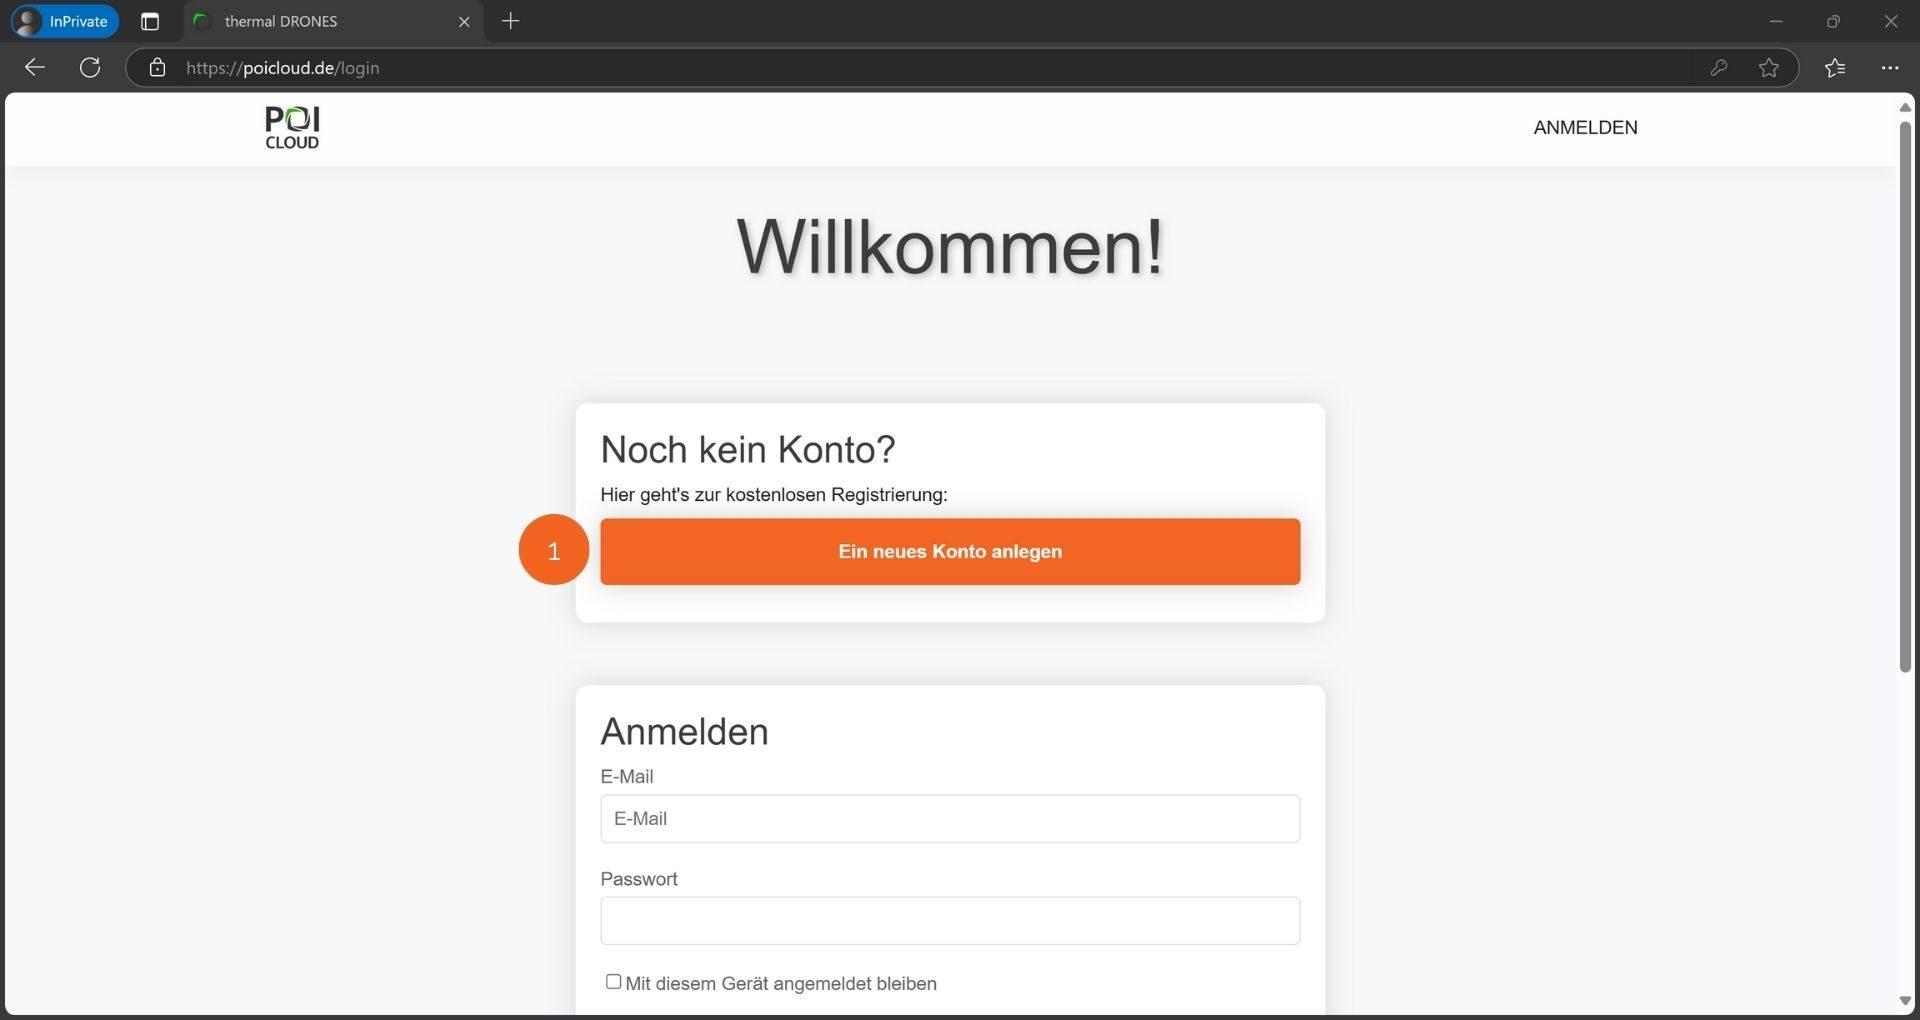
Before using POISuite and its applications, you must create a free account. You can access the registration page via the following link: www.poicloud.de.
Account Creation
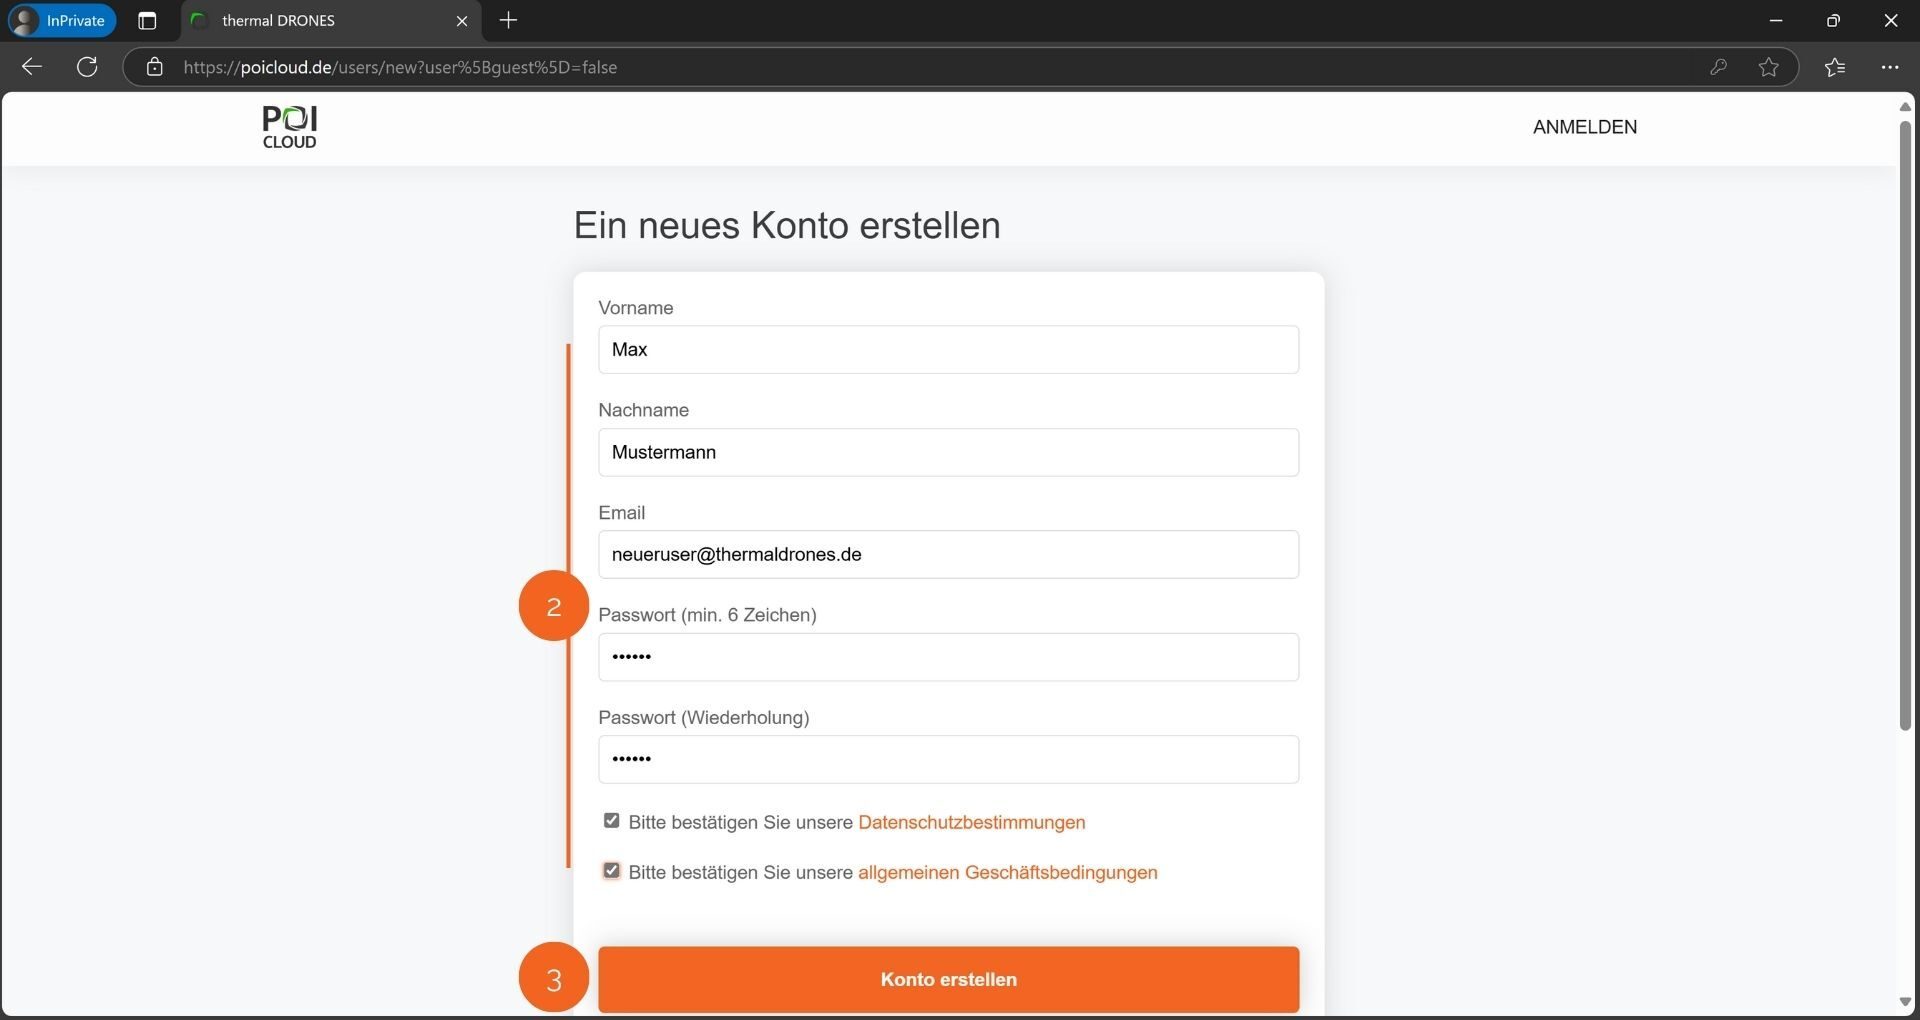
To create an account, click on the Create a new account button (1). After entering your data and setting a password, you must agree to the privacy policy and our terms and conditions (2). To do this, check the respective boxes. Then click on the Create account button (3) to confirm your entries and complete the account creation process.
POIApp Installation
The POI app is used as an interface between the drone and the search team. It combines all the important steps for successful wildlife and people searches in a single application. The app includes functions such as area creation, team and task management, statistics generation, and a navigation function for searching in the field. Markings can be forwarded directly to the drone remote control from the app, and markings from POIStudio appear here in real time.
The installation is done as a web application. The app can be used on both Android and iOS devices. It can also be used as a web application on a PC. SeePOICloud documentation.
-
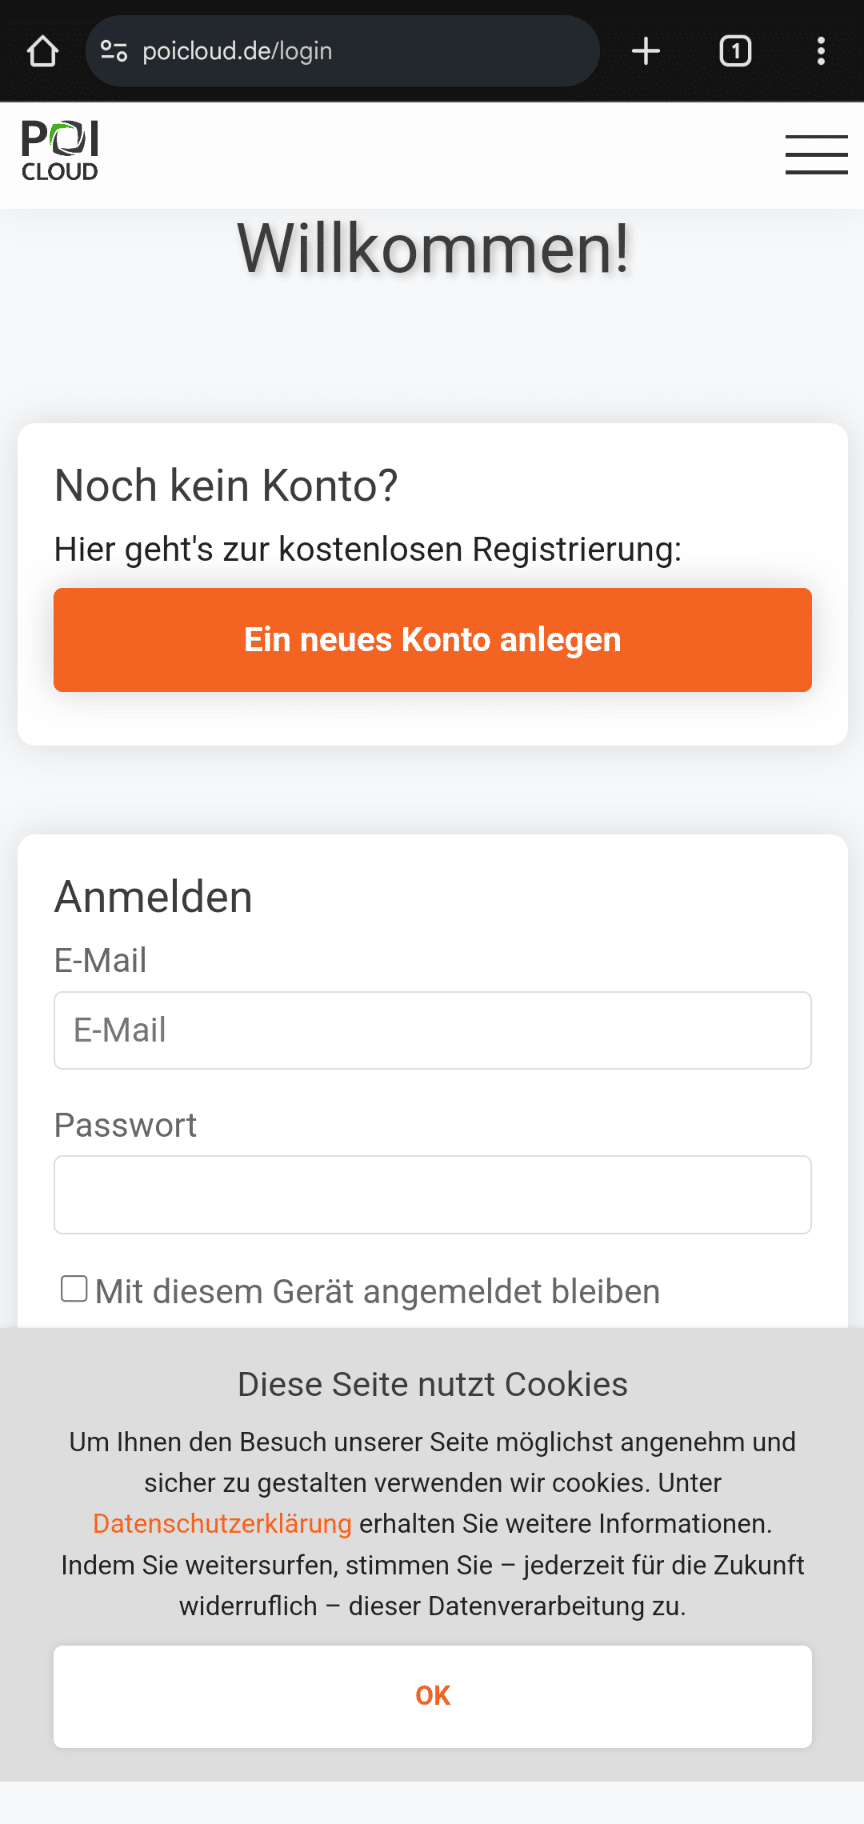
Installation on Android Devices
– Open Google-Chrome Browser.
– Enter poicloud.de/login in the search bar.
– Tap the 3 dots in the top right corner for more options.
– Select Add to home screen.
– Click install.
– Confirm installation.Note: Permission to use location services must be granted in order to use this feature!
-
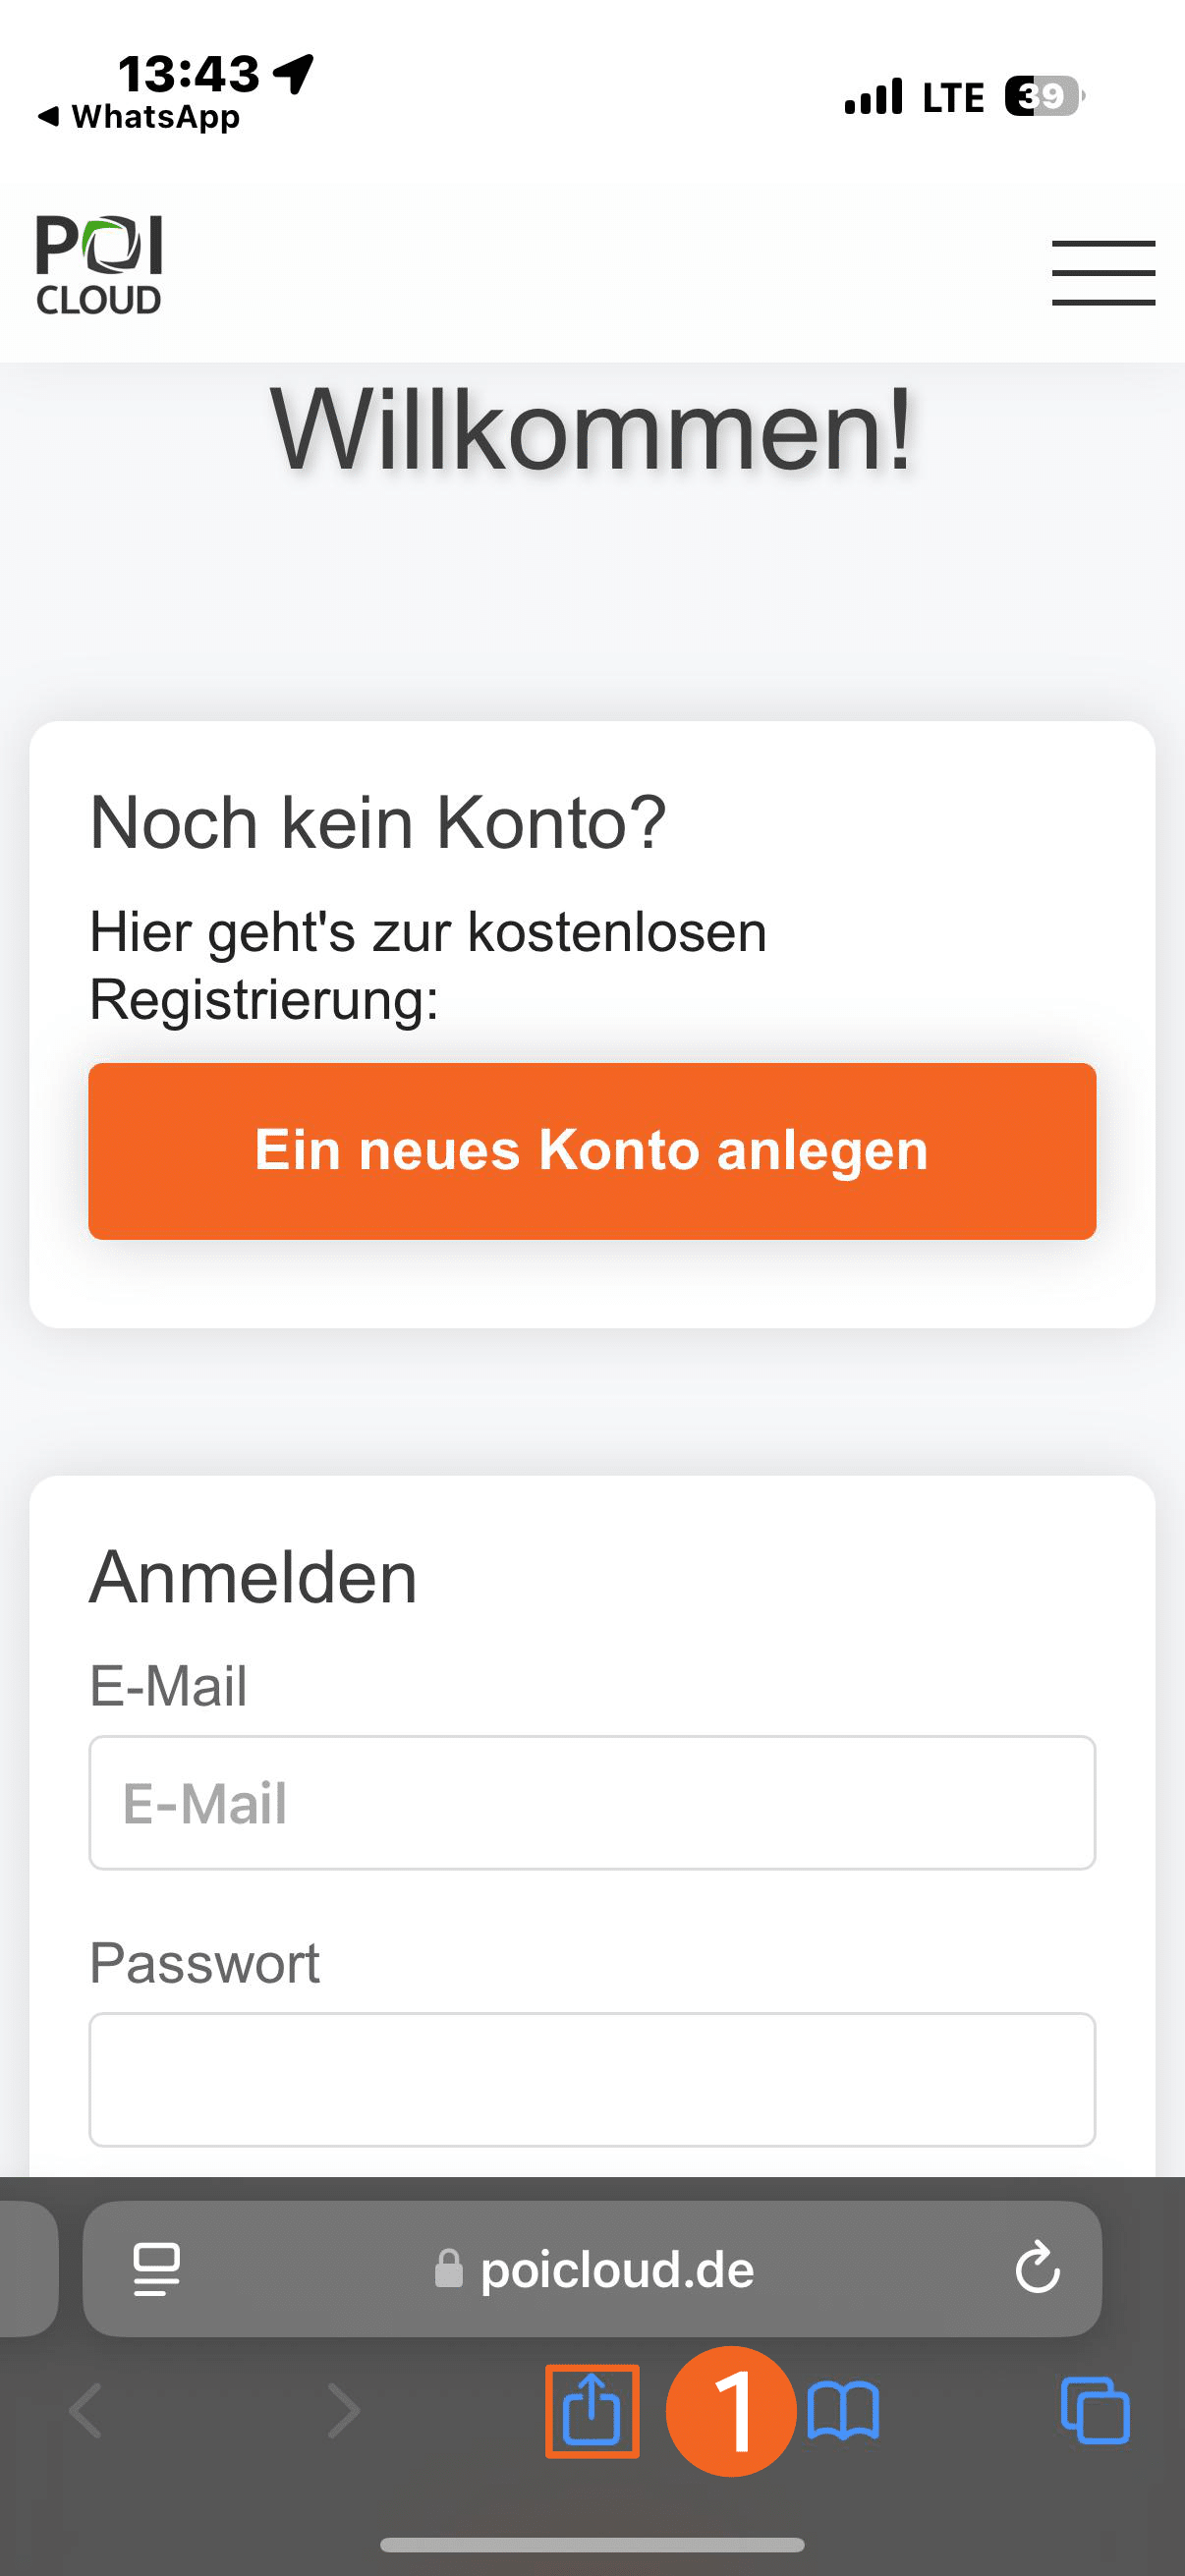
Installation on iOS Devices.
– Open Browser.
– Enter poicloud.de/login in the search bar.
– Click on the share button.
– Select To home screen (2).
– Click on Add (3).Note: Permission to use location services must be granted in order to use this feature!
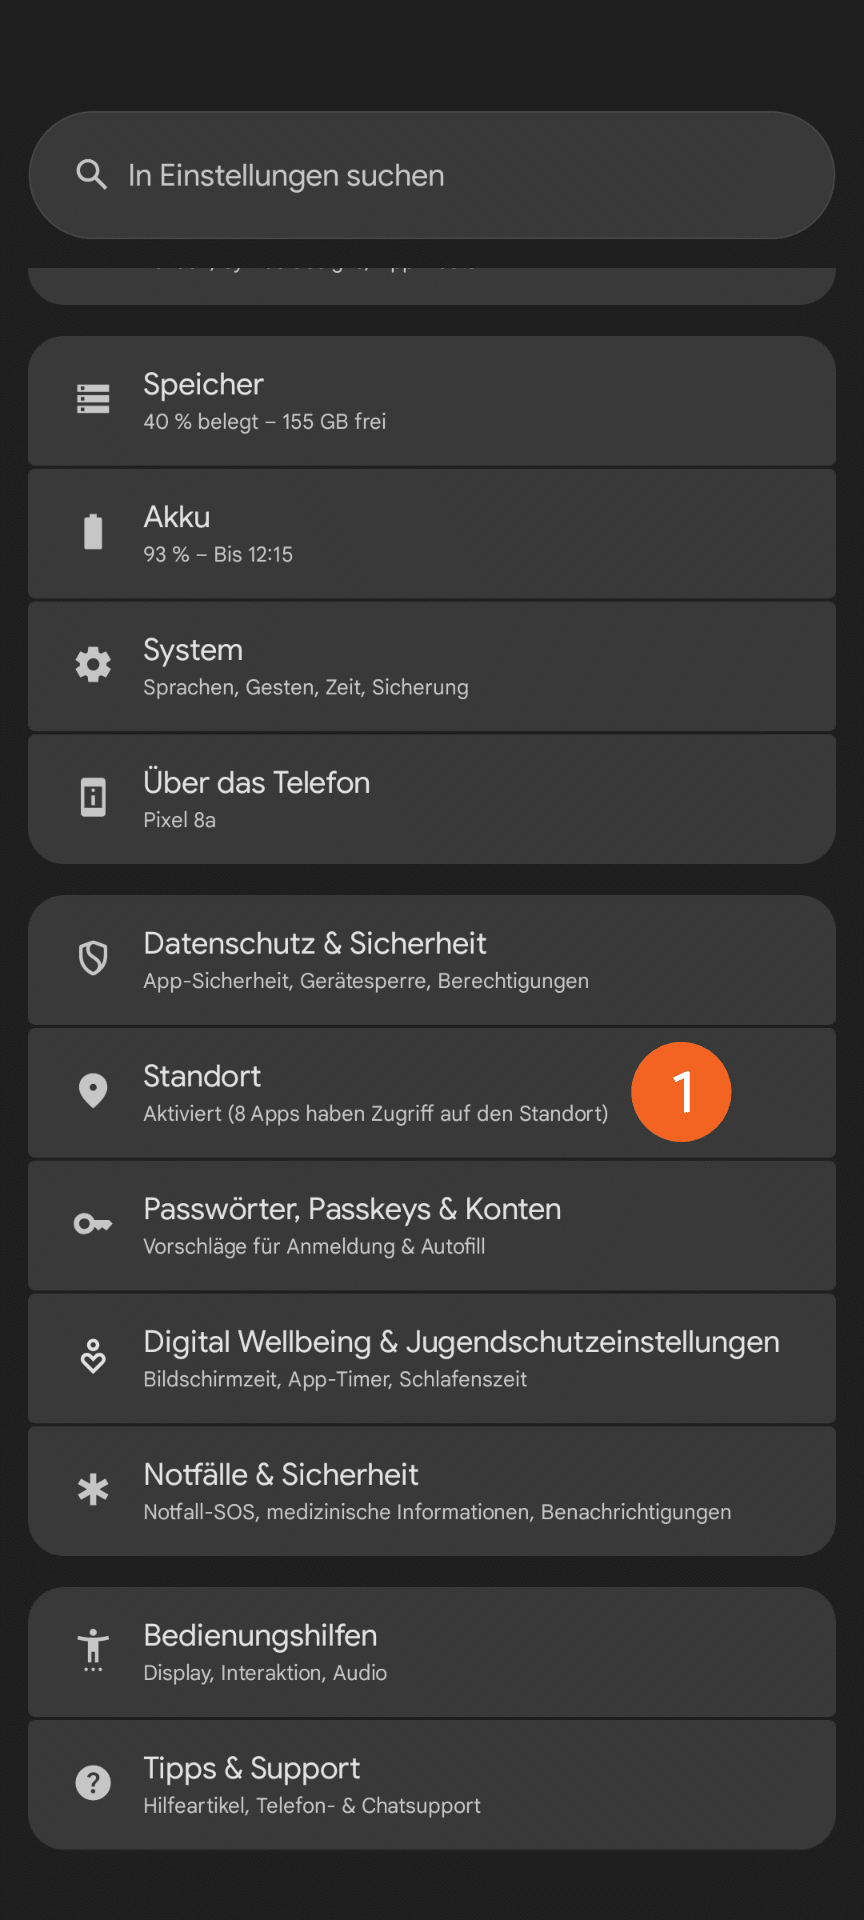
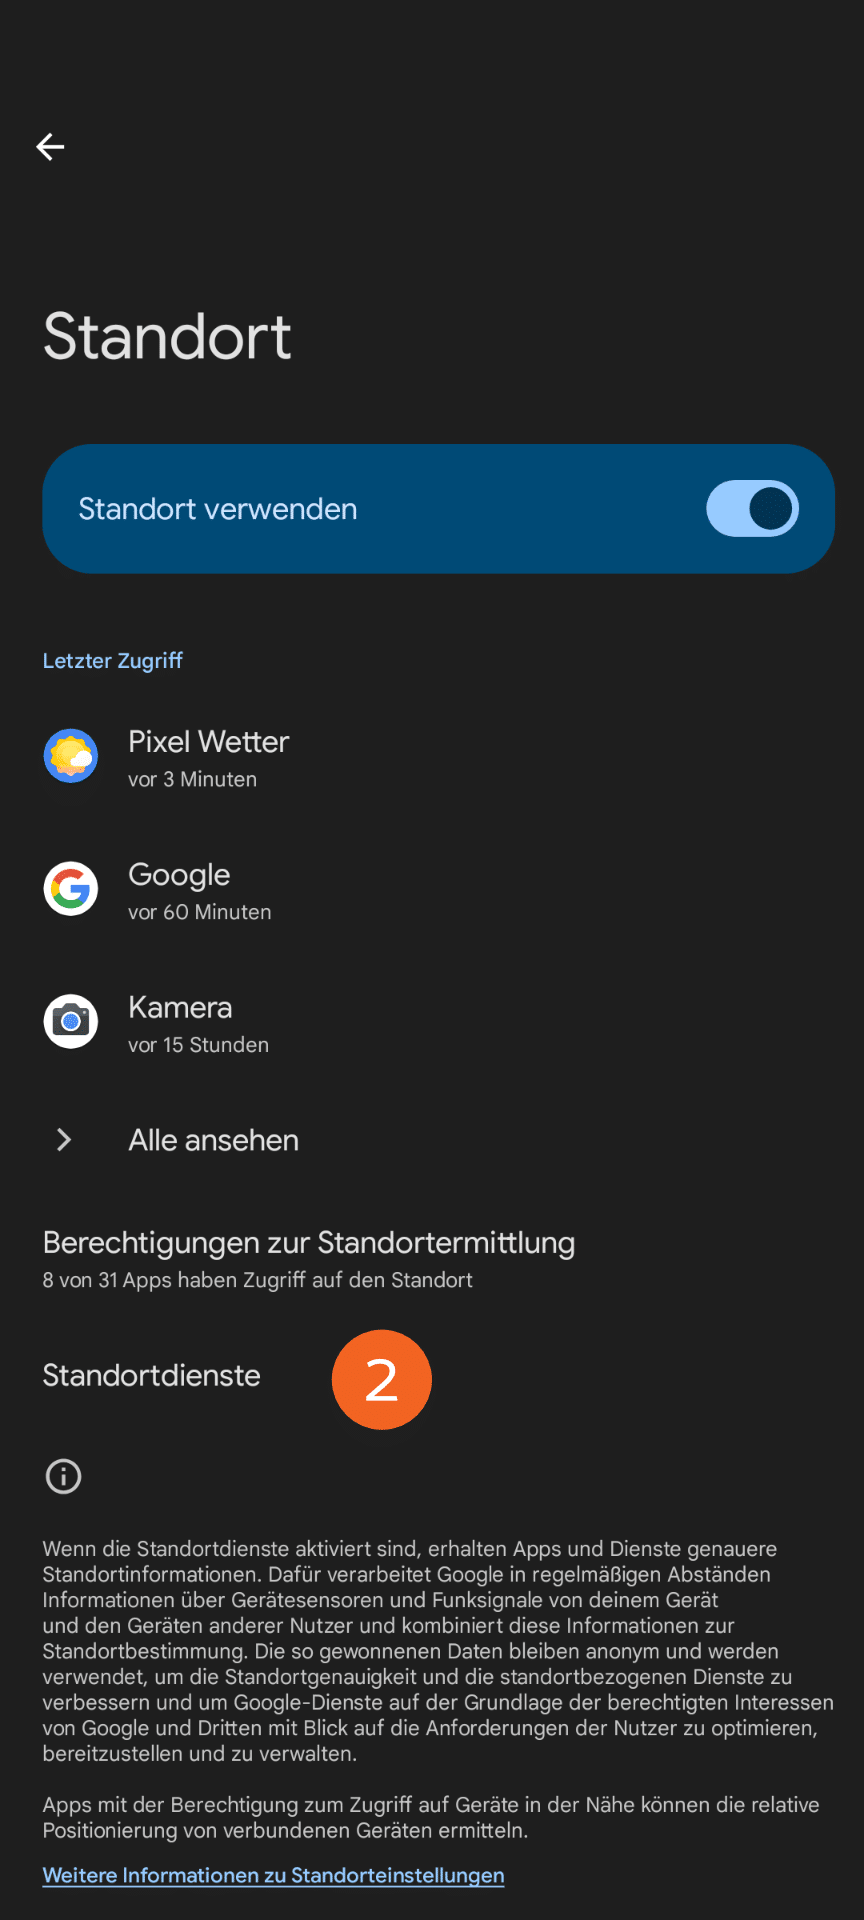
Note for Android users: for optimal use of GPS, the Improve location accuracy function must be deactivated! On Android devices, this function can be found in the location settings:
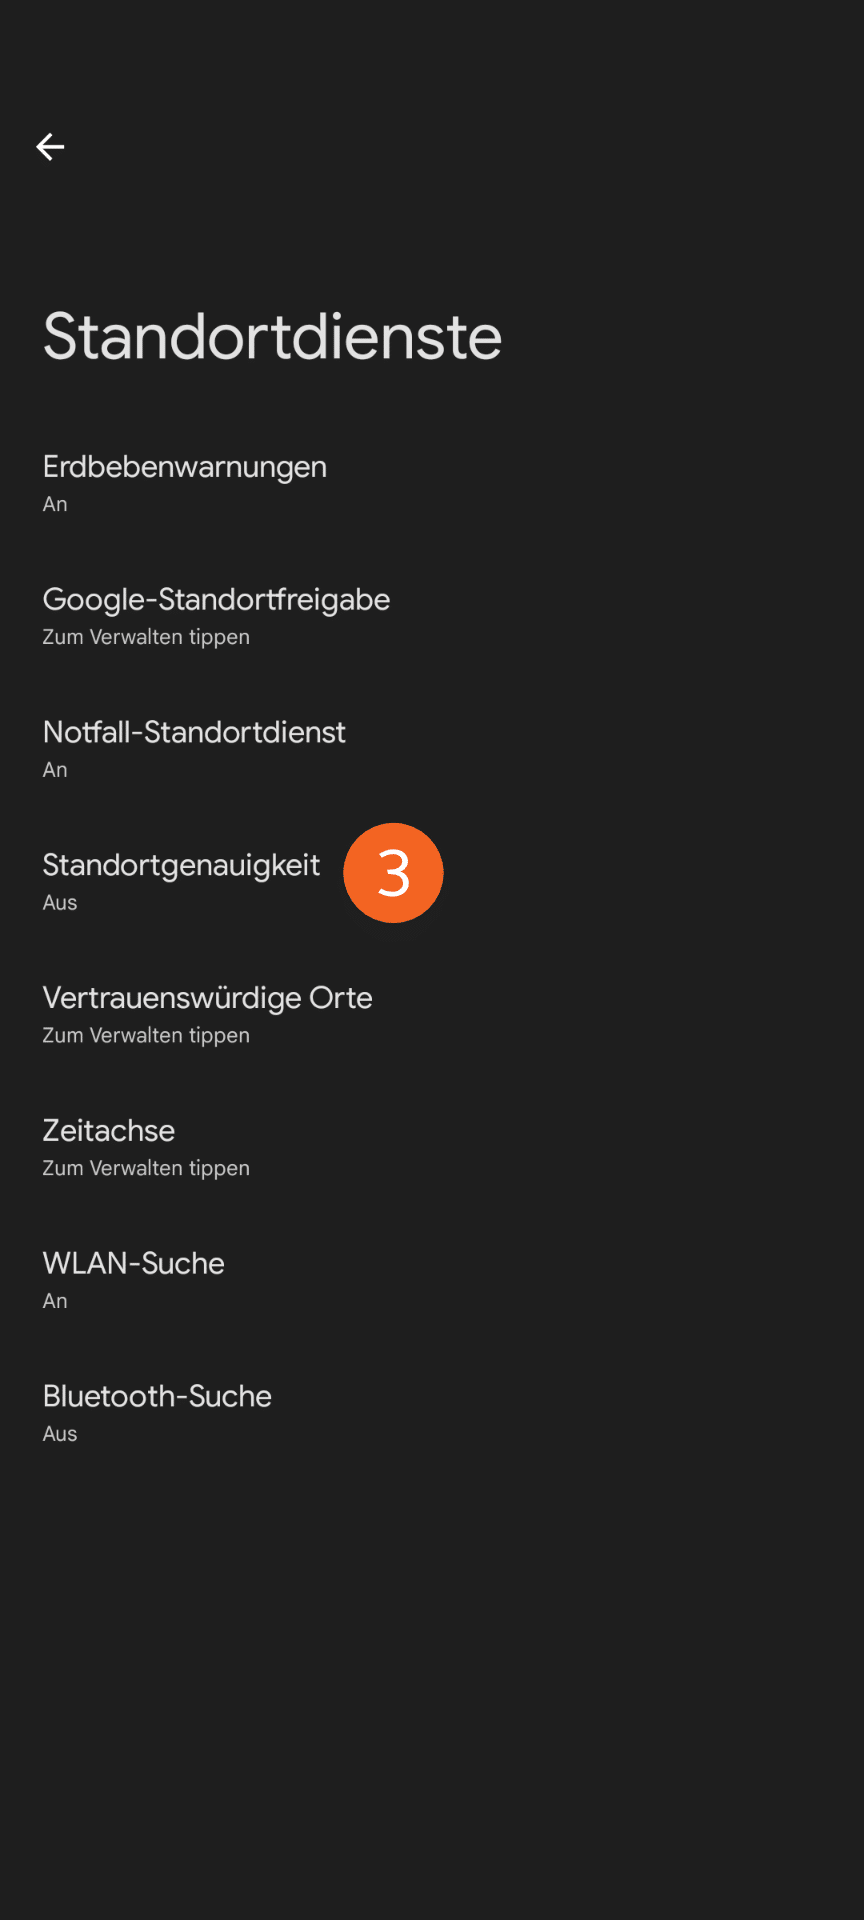
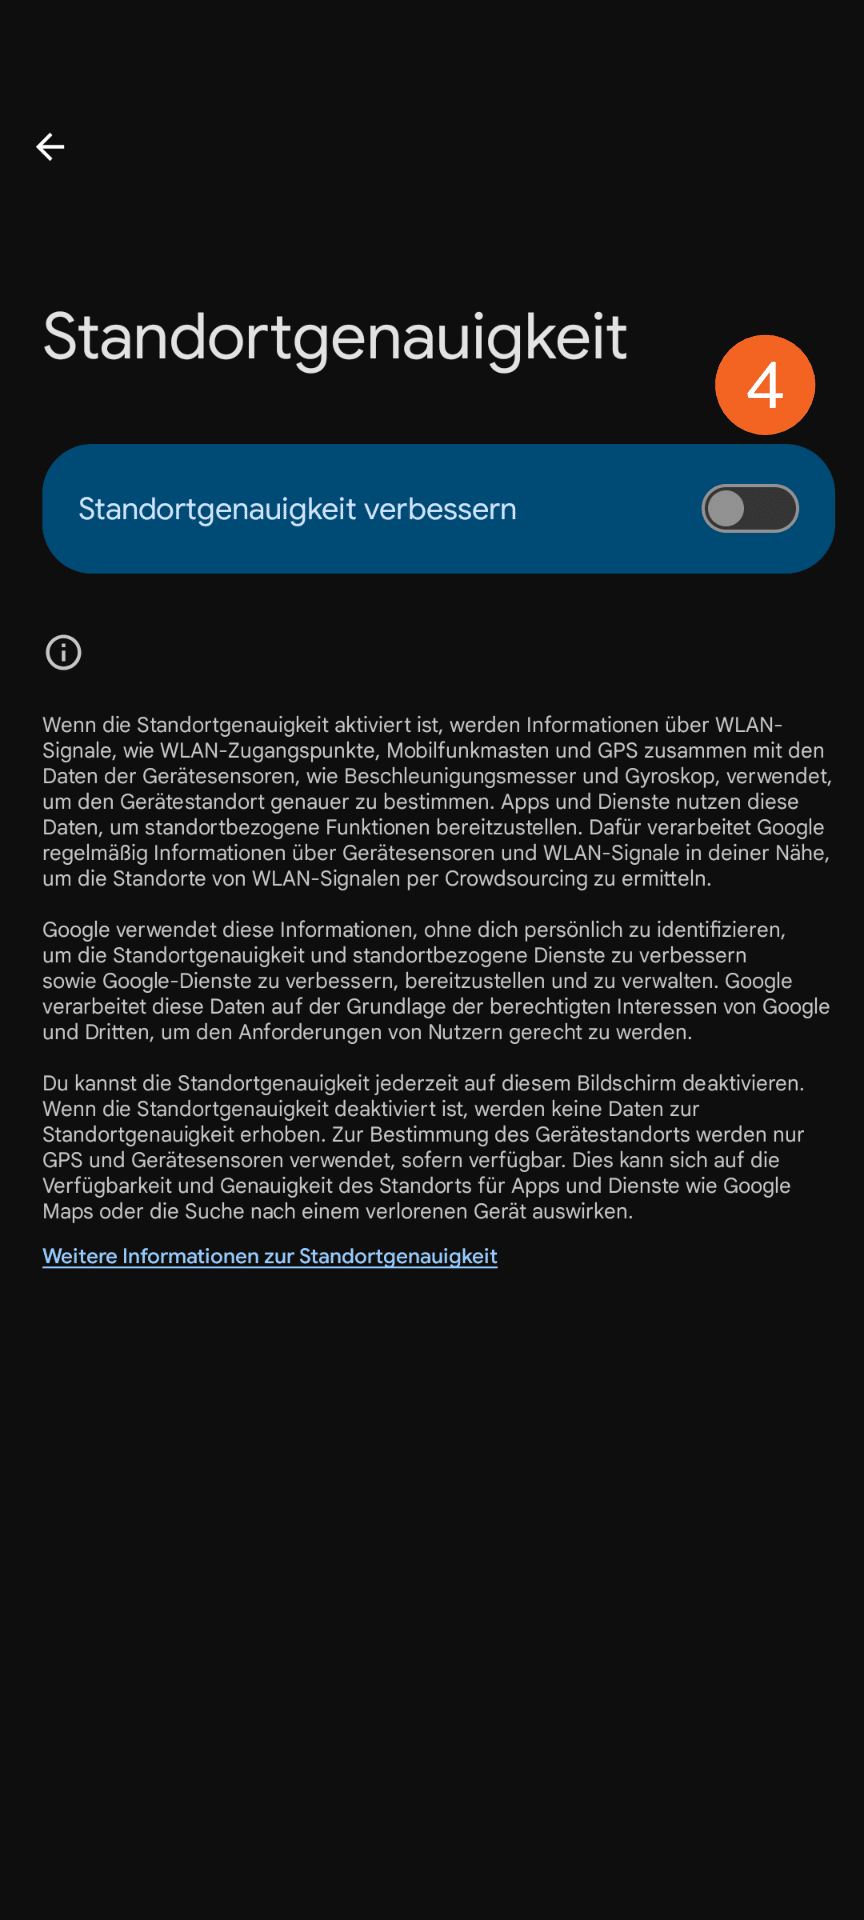
Detailed instructions on how to use the POIApp can be found here.: POIApp Documentation
Connecting drone remote control - POICloud
In order to use services such as POICloud or POIConnect/EasyPOI, all drones involved in the operation must be connected to our cloud service. How this works is explained in the following section.
DJI-PilotApp User Interface
First, the following view appears on the drone remote control screen. Under Cloud Service (1), you have the option to add a cloud service. By default, the message ‘Not logged in’ appears here.
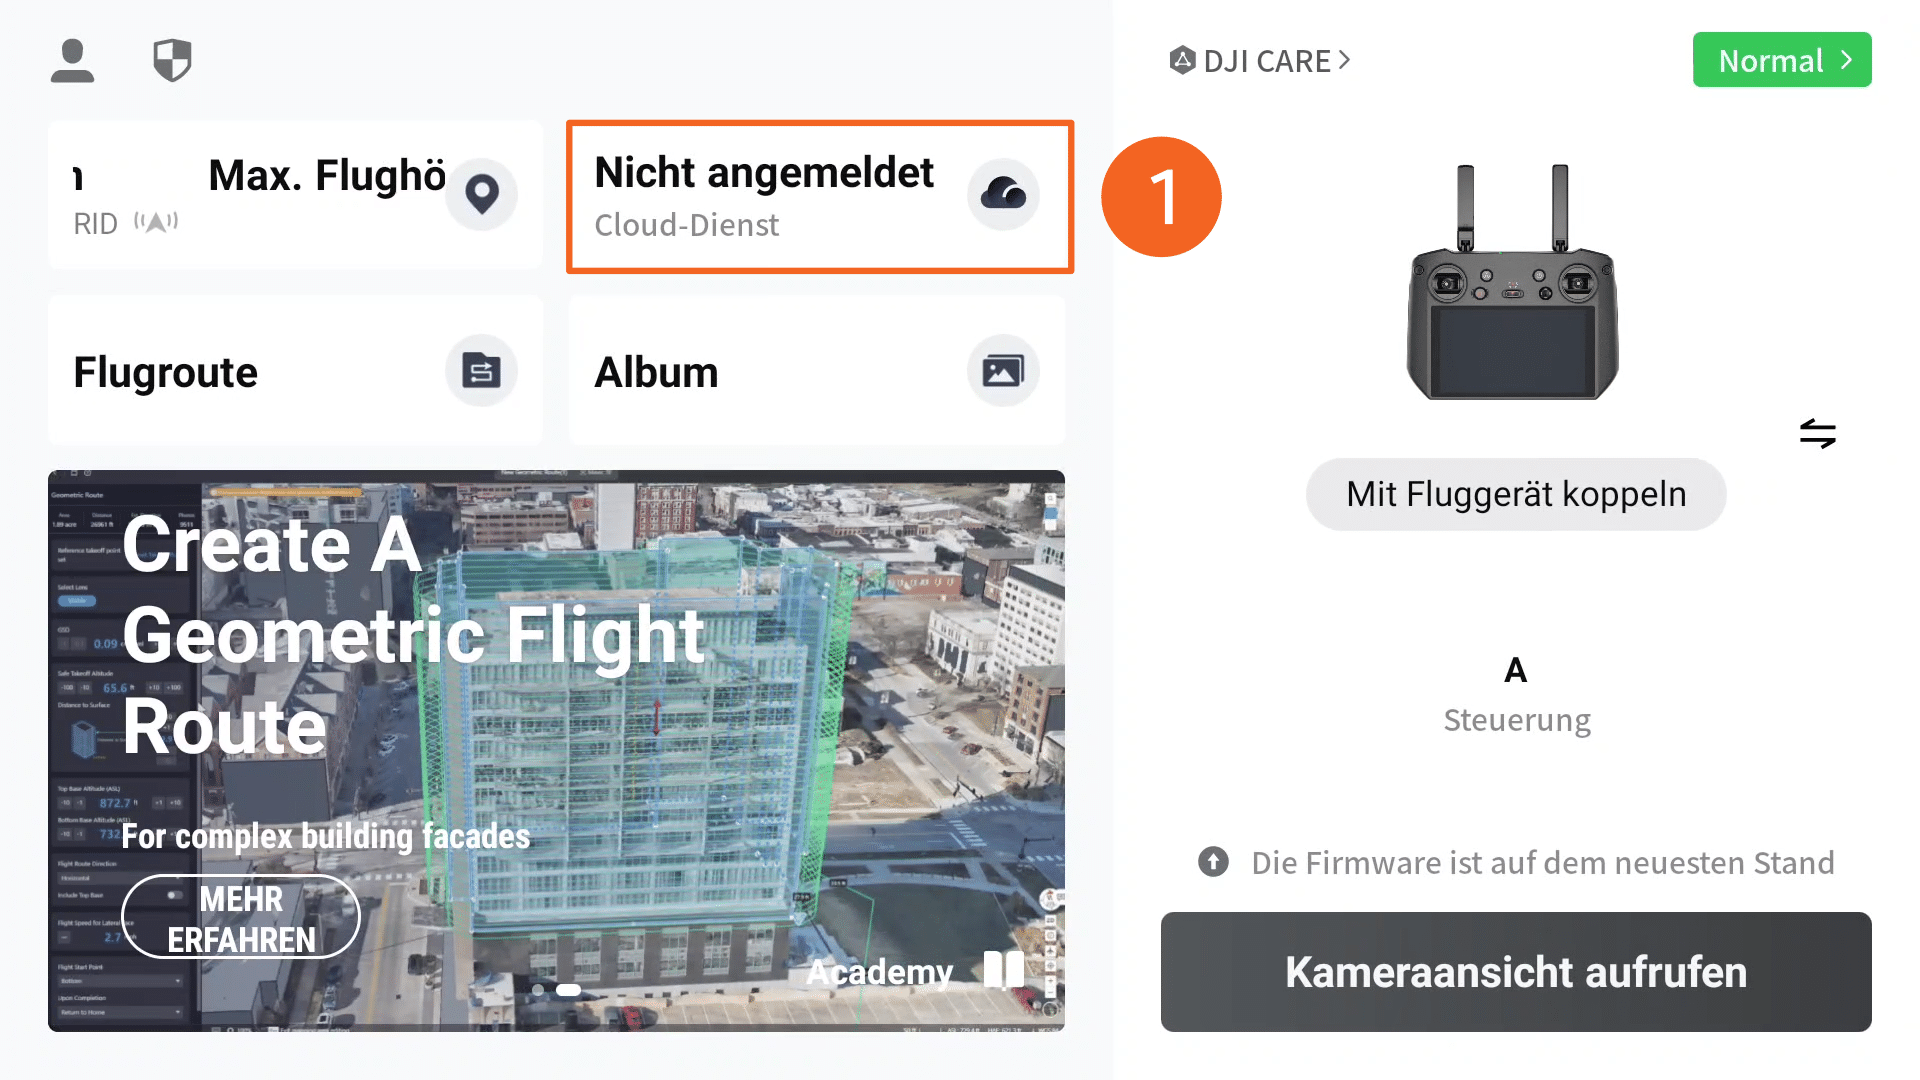
Clicking this button opens the menu for cloud services. Since POICloud is a third-party service, you must select the Open Platforms control panel (2) here.
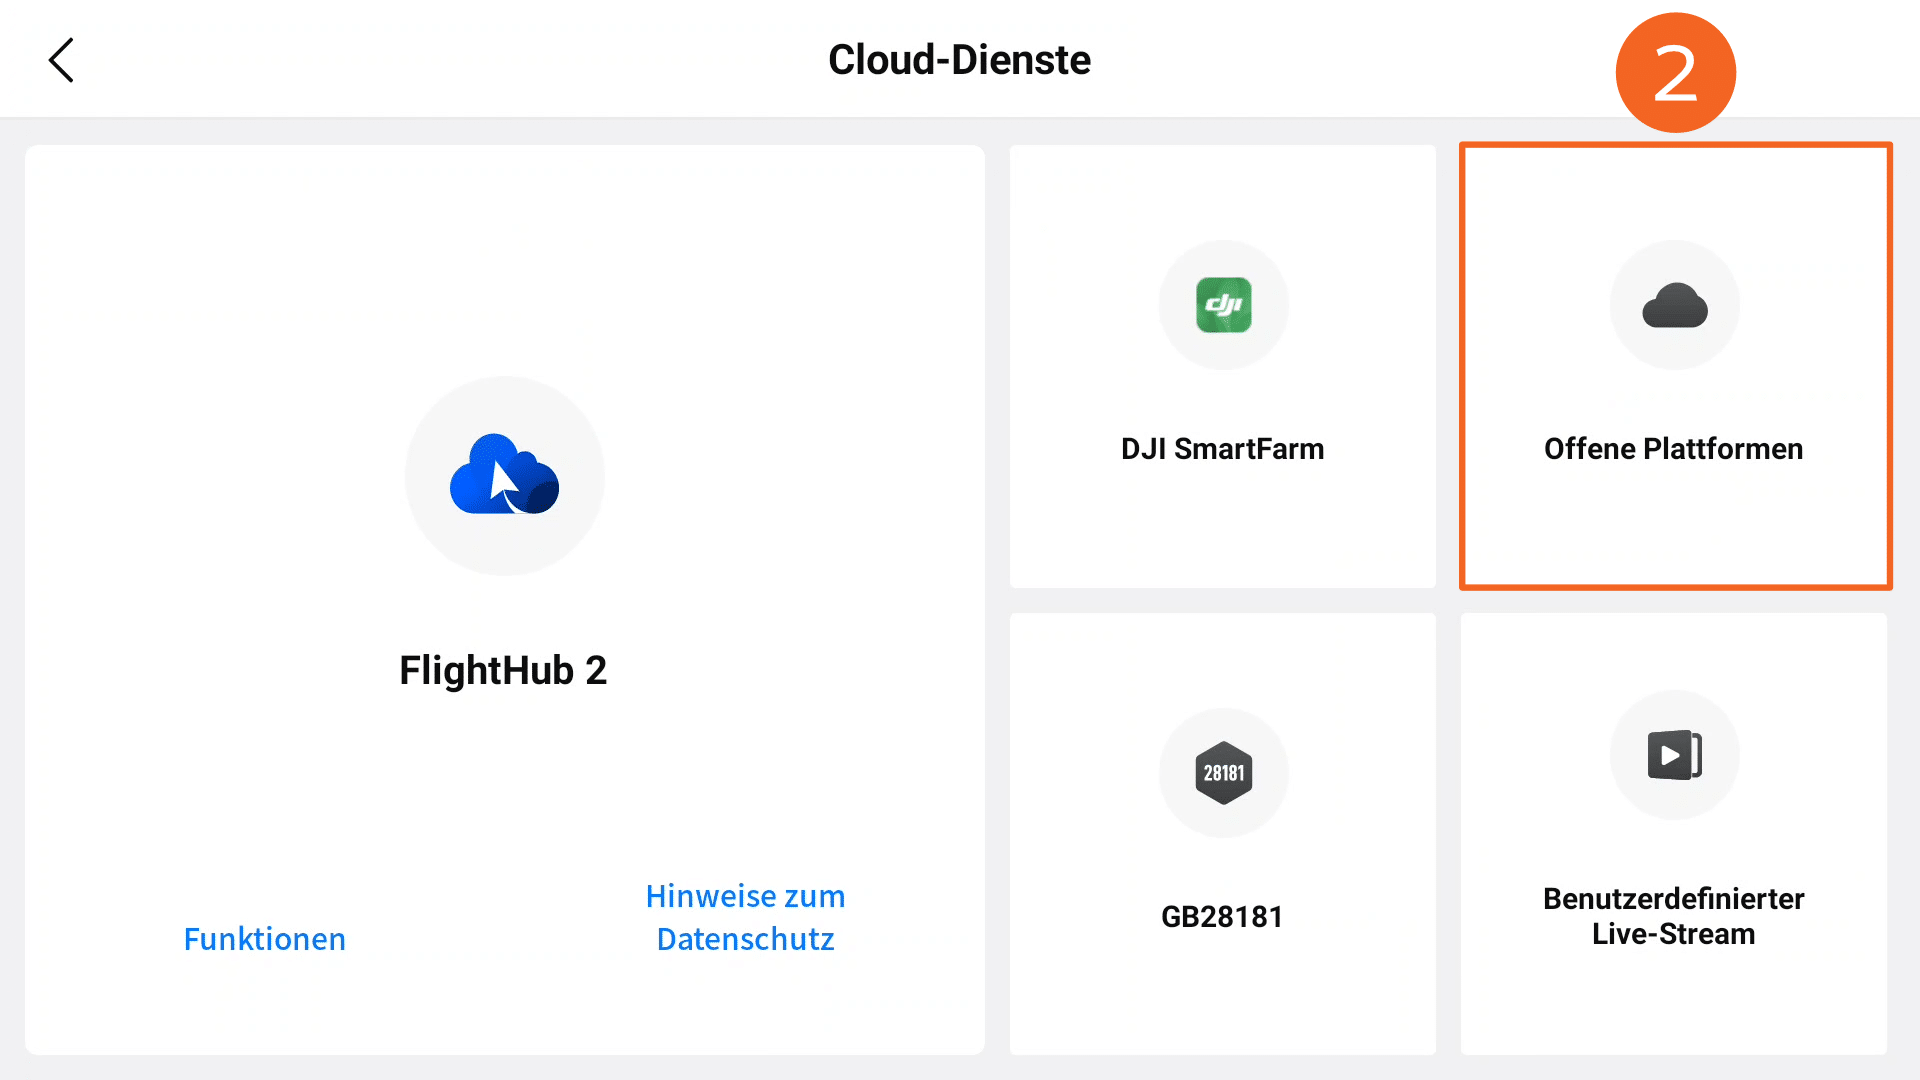
Next, you need to enter the corresponding web address/URL (3). In the case of POICloud, this would be https://poicloud.de/cloud. Click on Connect and the drone remote control will establish a connection to POICloud.
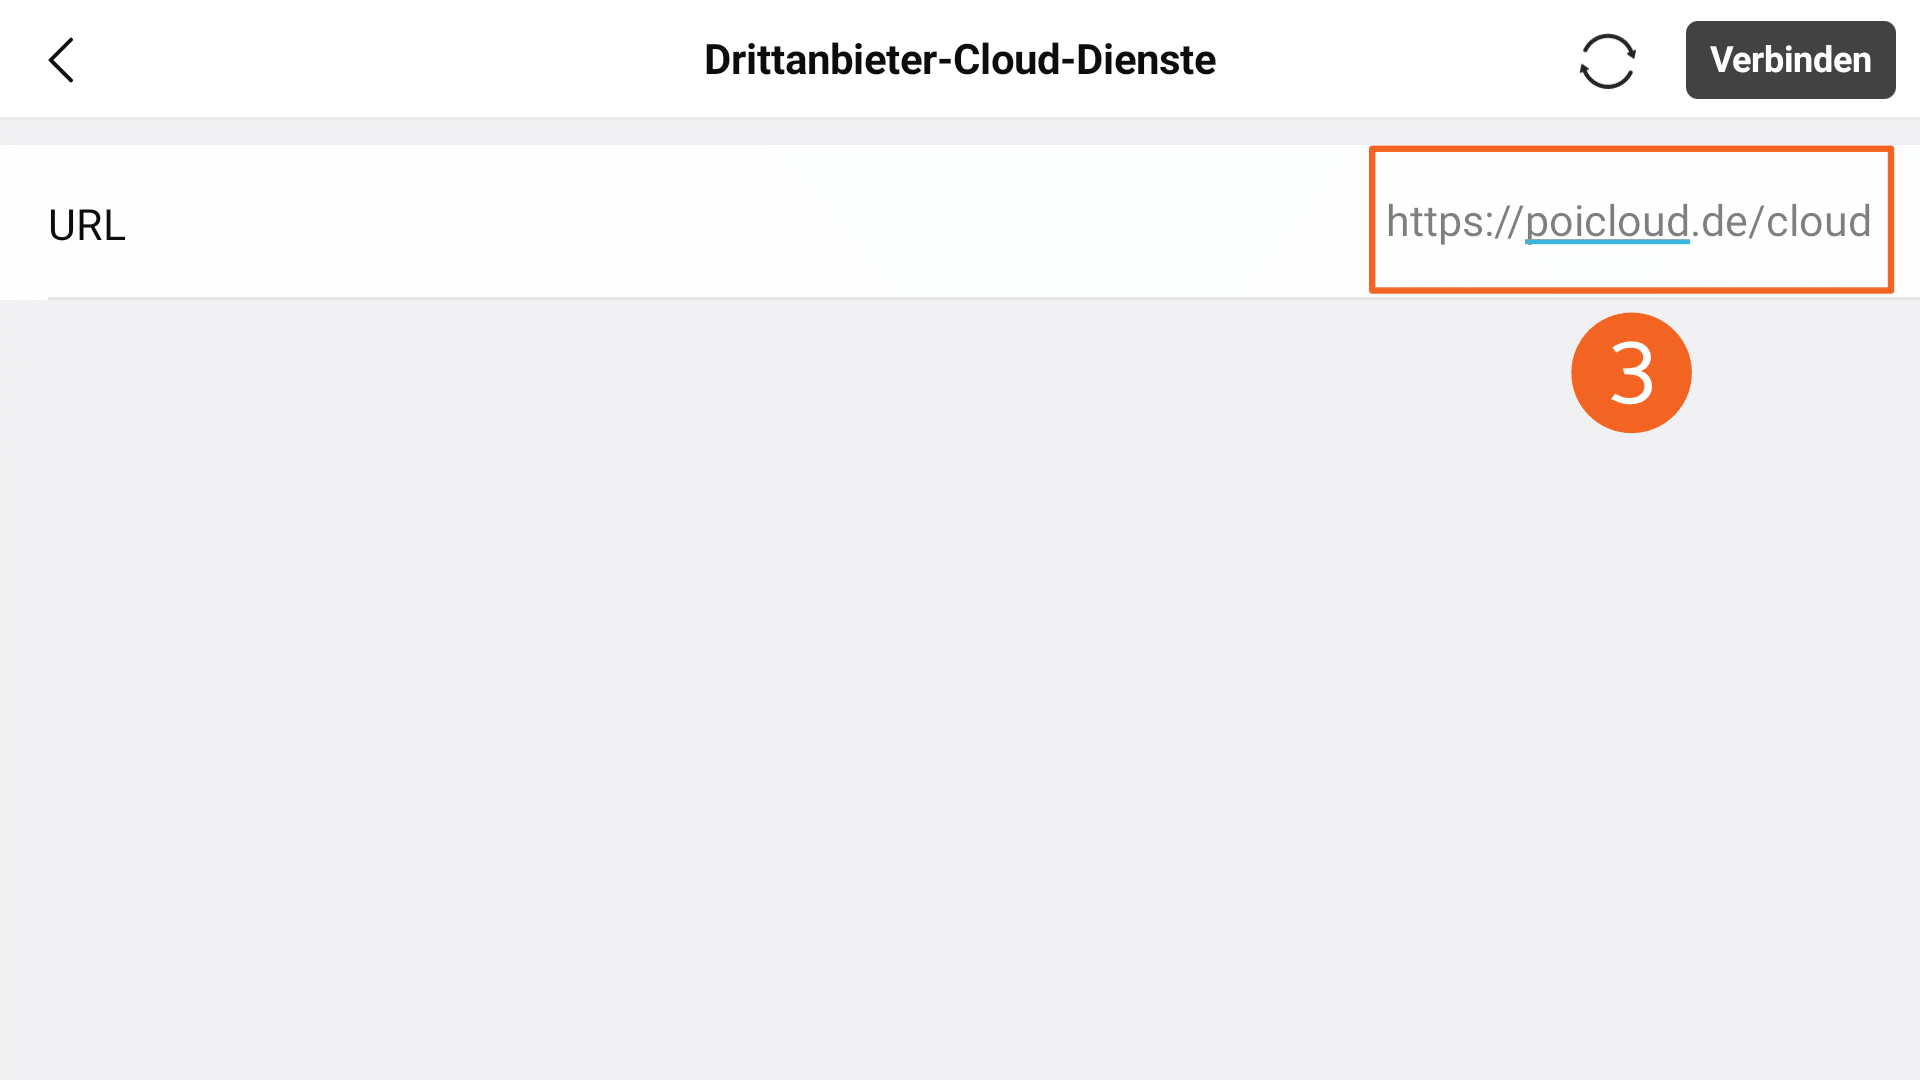
Registration POICloud
In the login window that appears, enter your email address (4) and password (5). These details are the same as the POICloud login details you used when creating your account. Click on the login button (6) to log in.
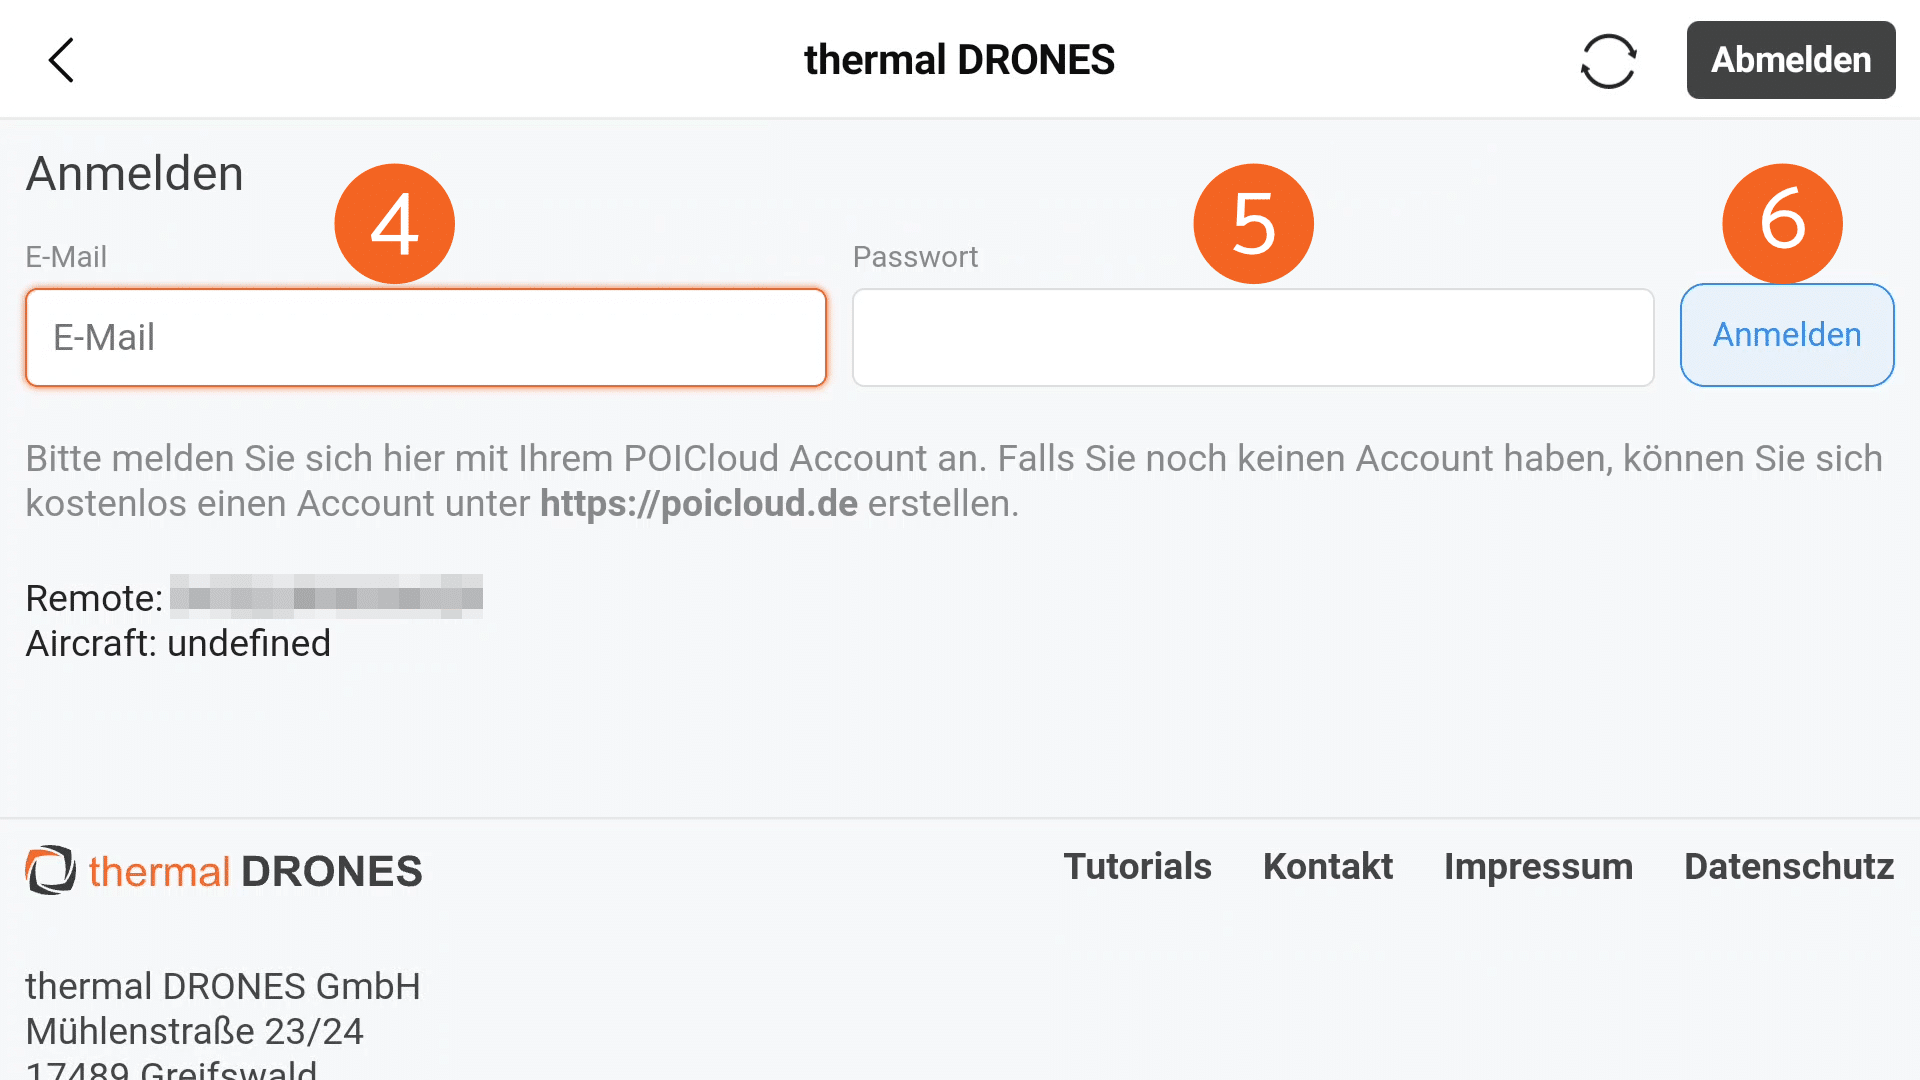
Selection Organization & Team
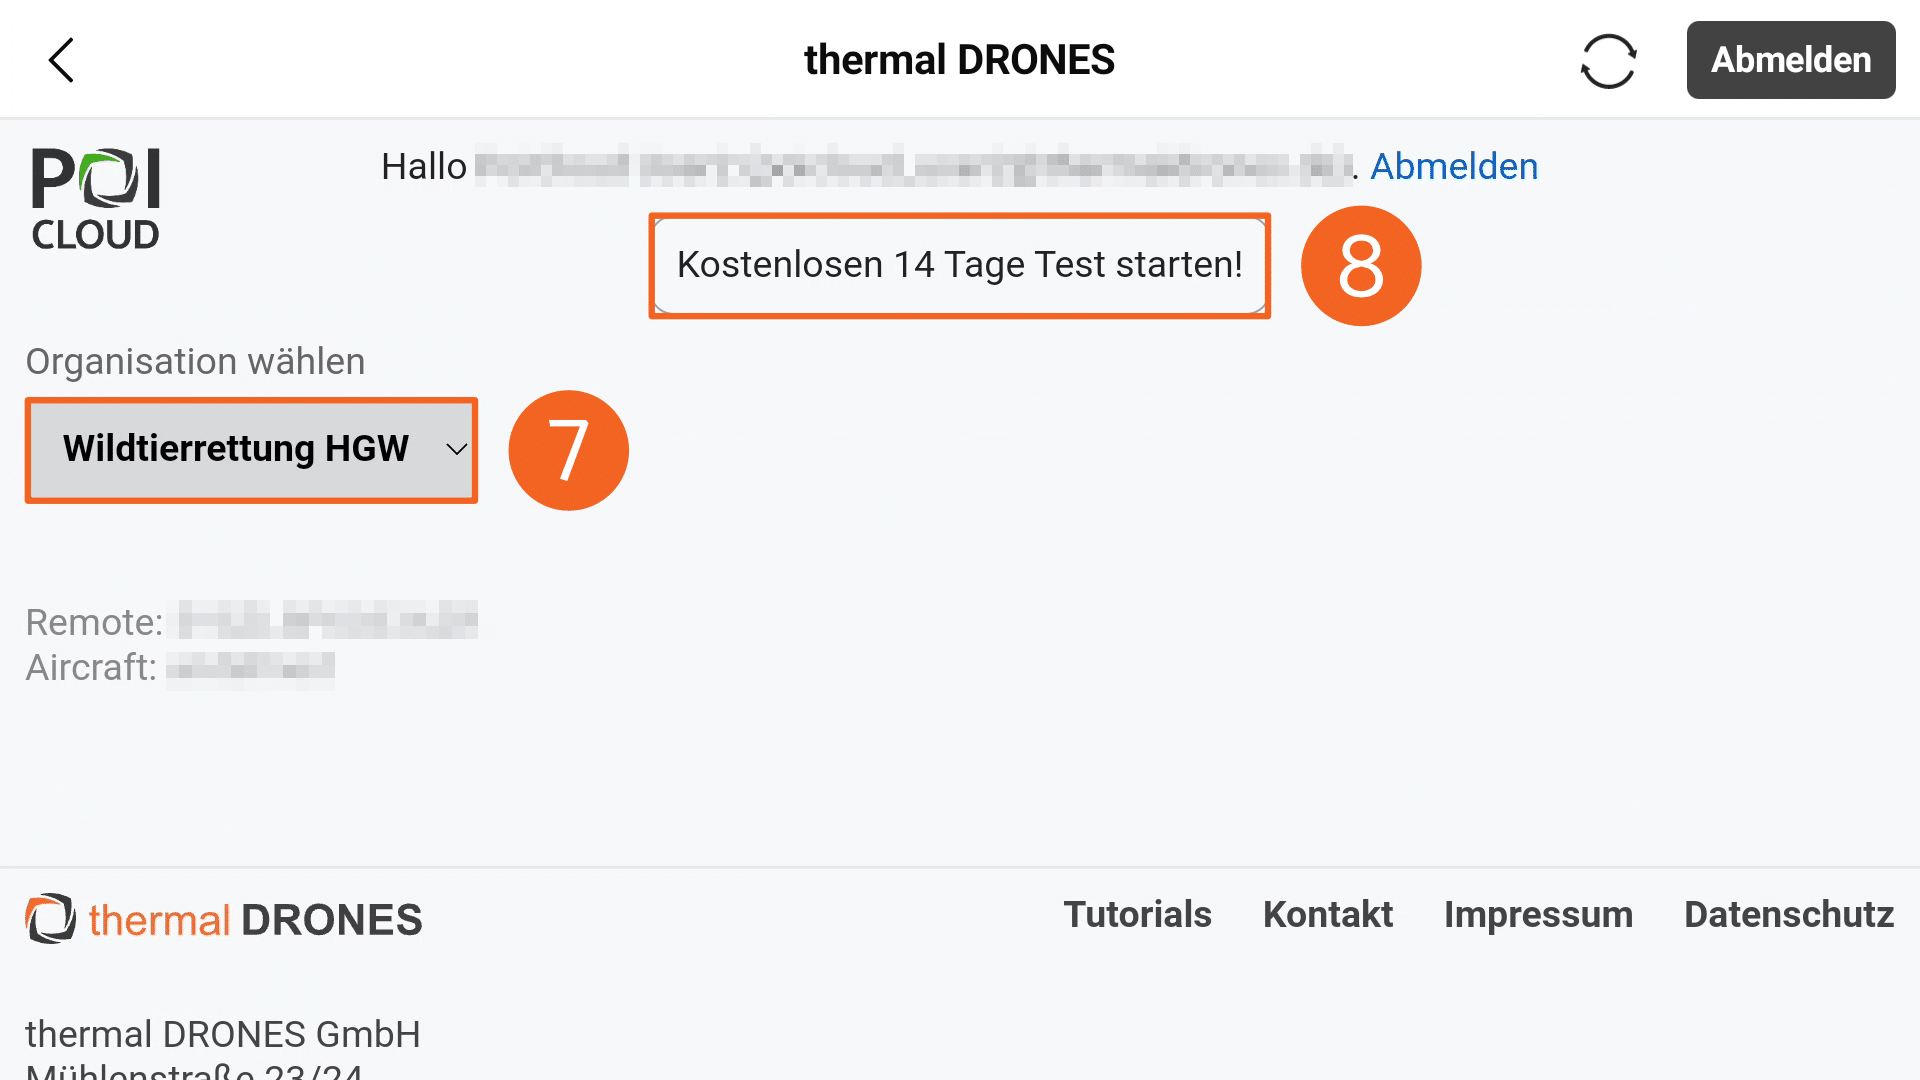
After logging in, the POICloud user interface home page opens. Here, you must first select the appropriate organisation (7). If one has already been created and the specified account is a member of it, the selection is made automatically.
In addition, this overview offers the option of activating a 14-day trial access for POIConnect. To do so, simply click on the Start free 14-day trial button (8). Once activated, functions such as the automatic transfer of POIs from the drone to the POI app will be available for a limited period of time.
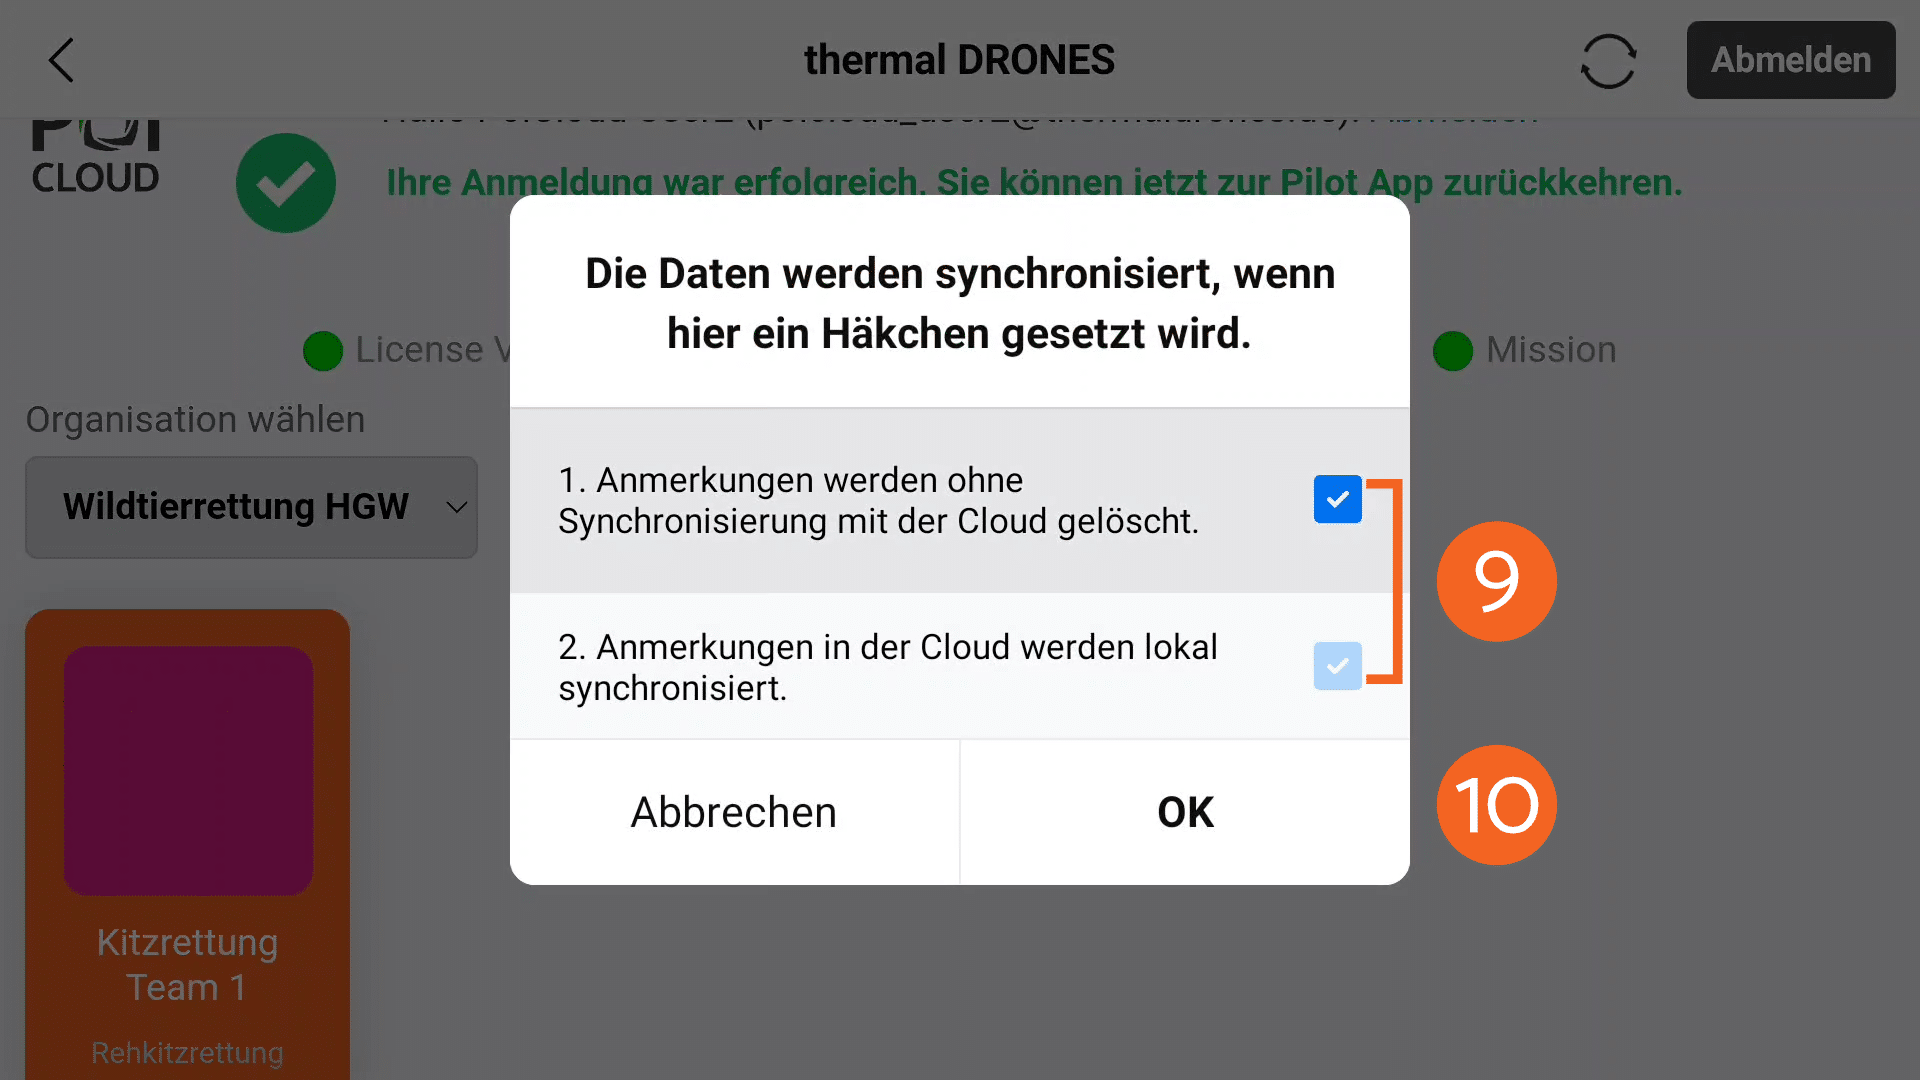
After selecting the organisation, a window opens in which the default settings for data synchronisation can be configured. It is important that both options are ticked (9). Click OK (10) to confirm the settings.
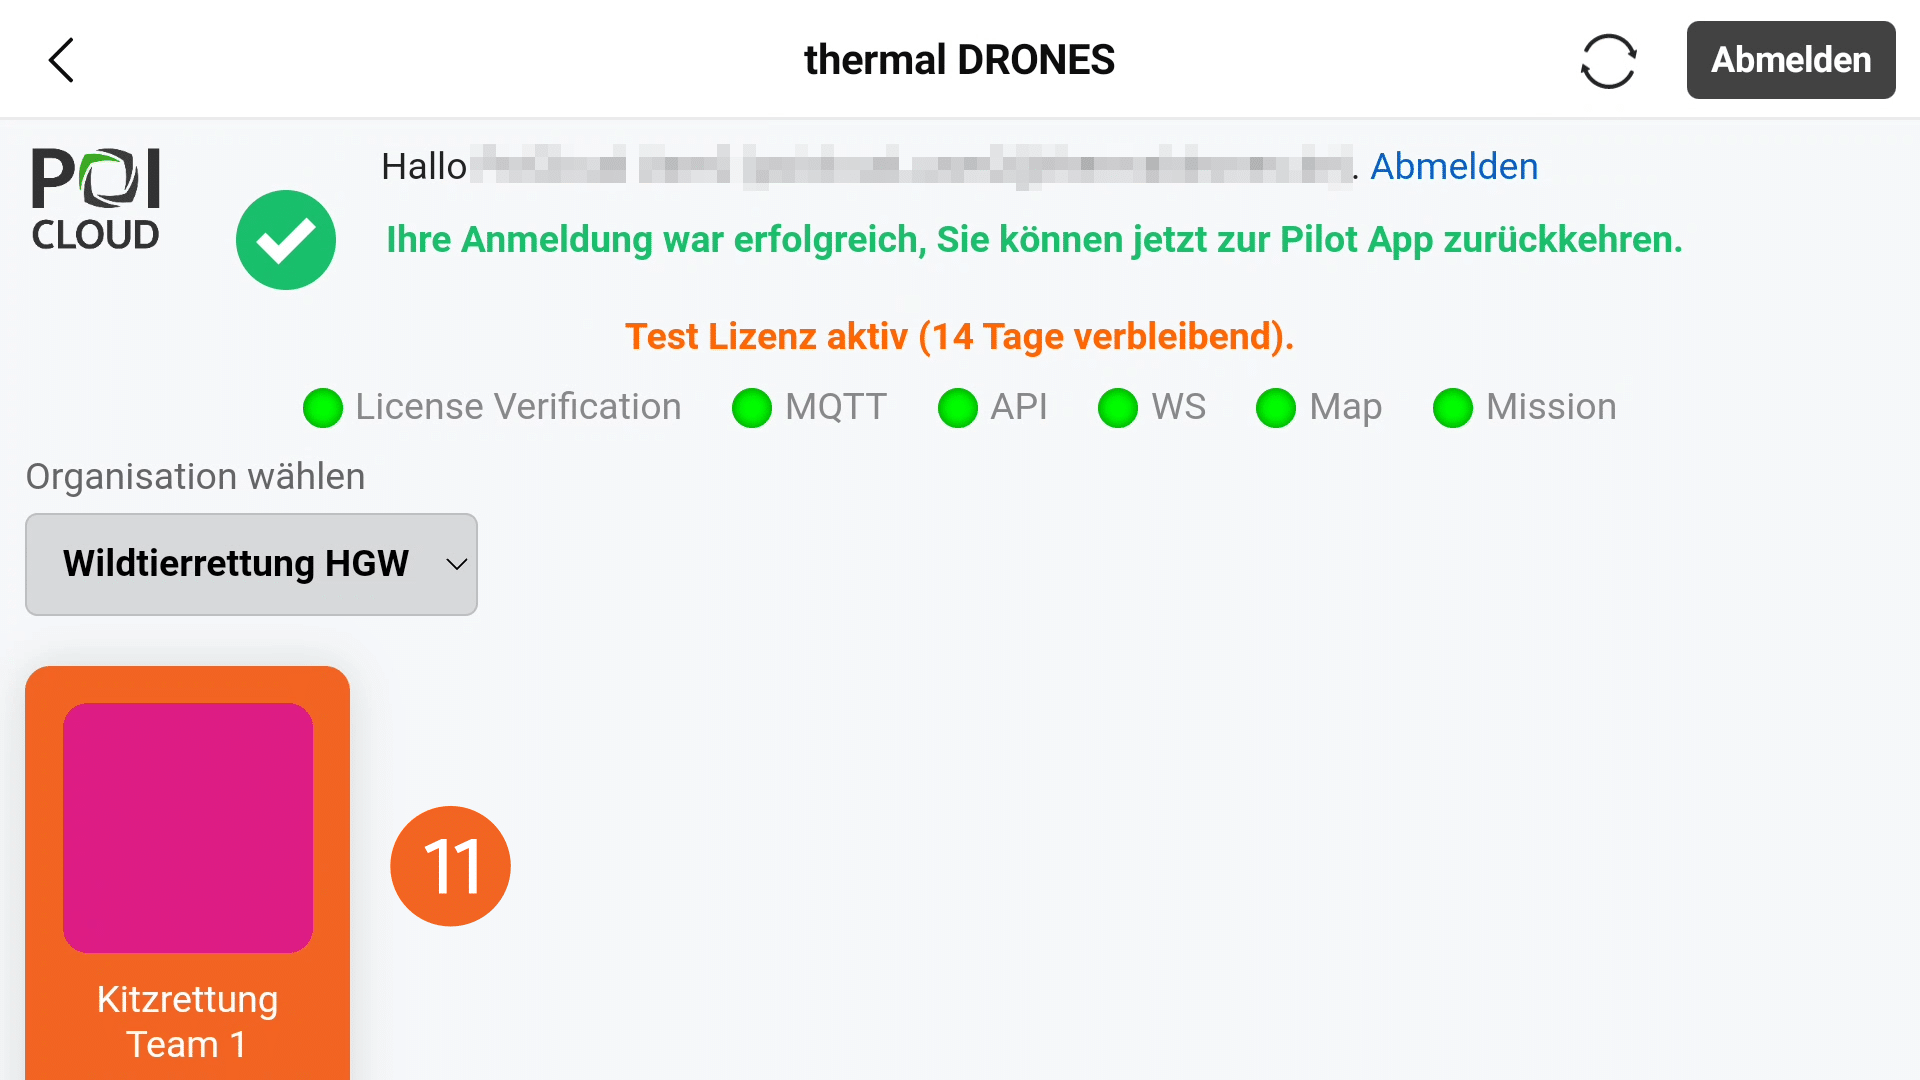
All teams included in the organization are now displayed in the overview. After selecting the appropriate team (11) and uploading, all currently created areas are visible on the drone remote control. Markings made with the drone also appear only in the team to which the drone is currently linked.
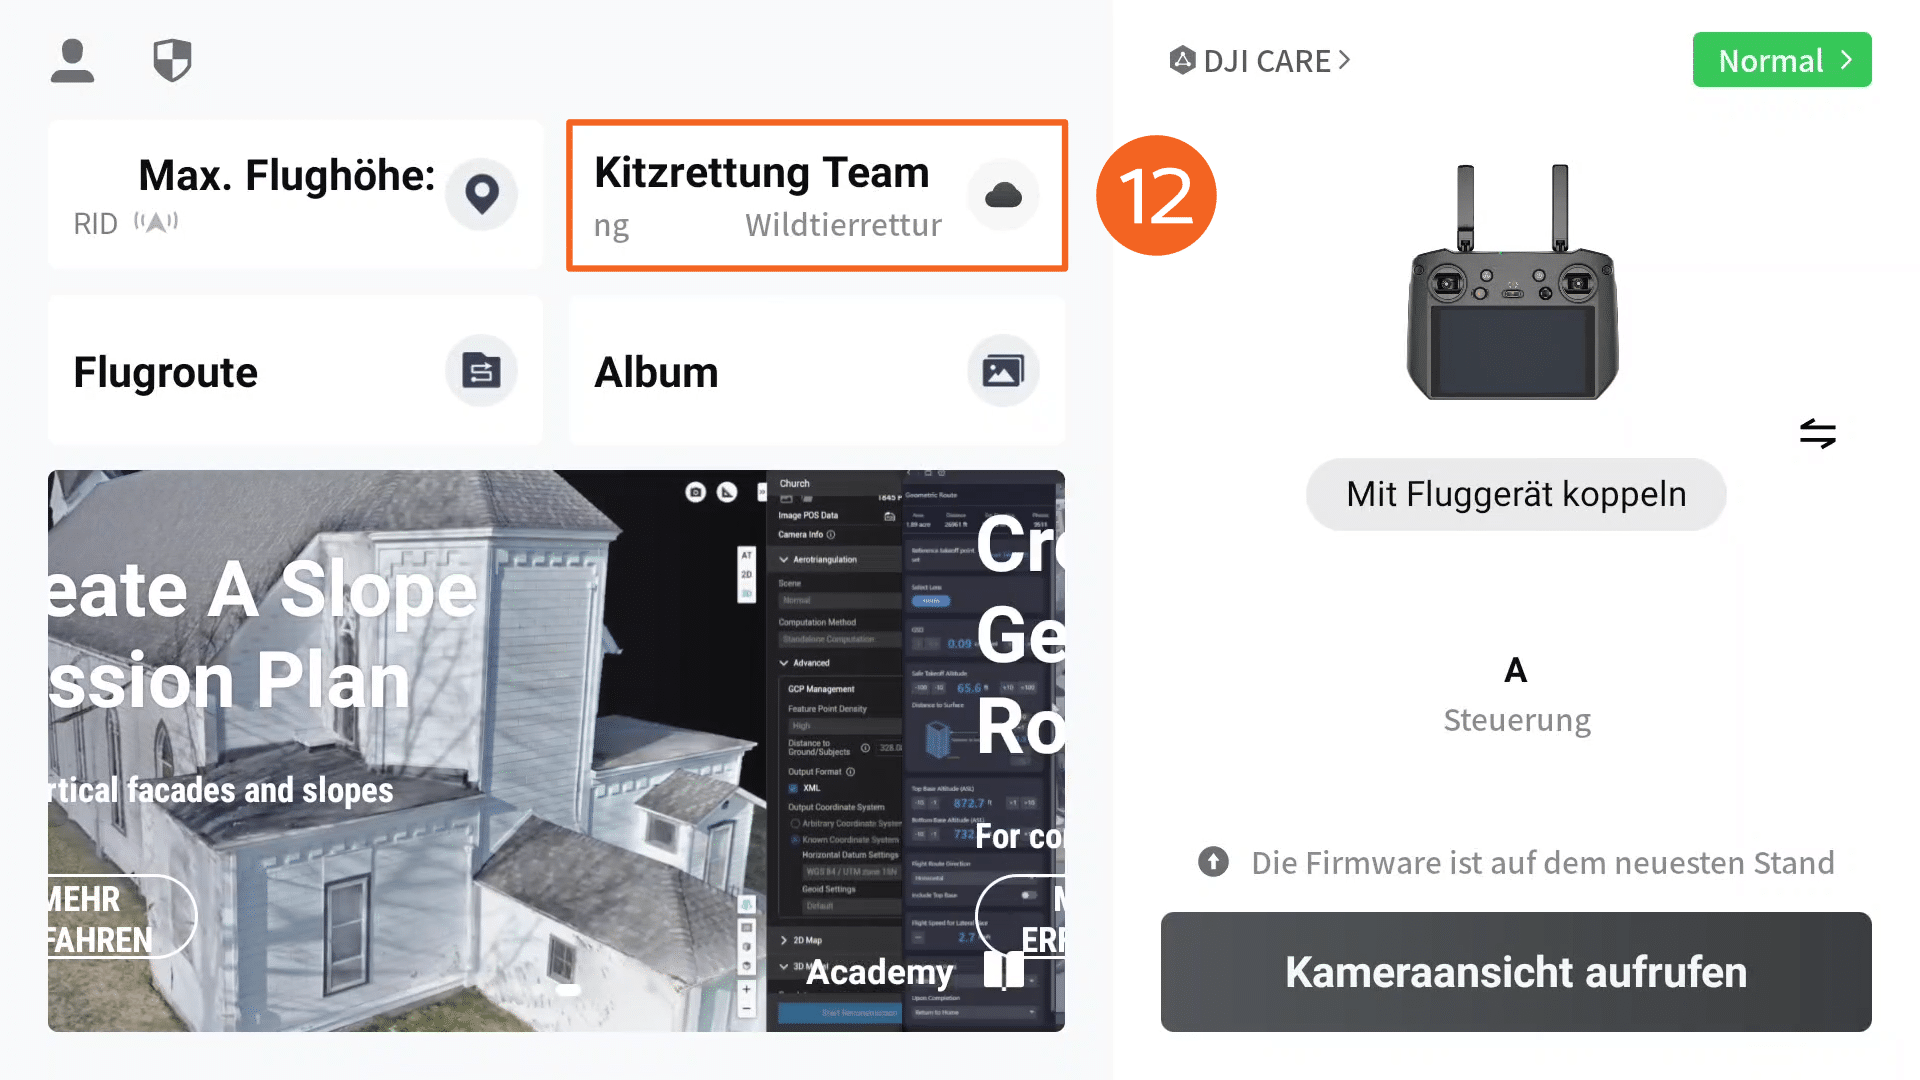
When you return to the remote control's start screen, the selected organization and active team will now appear in the cloud services overview (12) and the link will be complete.
Video tutorial – getting started with POISuite
In this playlist of short tutorial videos, you will learn all the important steps for setting up and using POISuite and its applications. Just follow the link!
Software
POIStudio - Download & Installation
Download
Several versions of PSInstaller are available for download on ourdownload page. POIStudio can currently be used on systems running Windows or MacOS. A version for Linux is still in development. To download, click on the button next to the version applicable to your system:
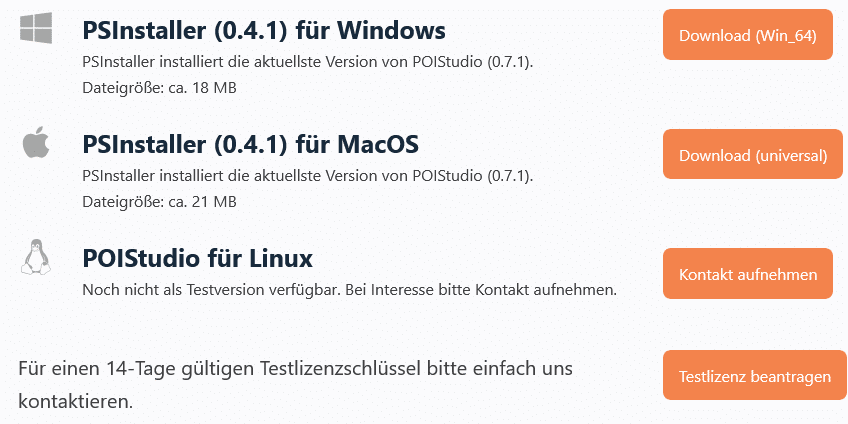
In addition, you can request a 14-day trial period for POIStudio. To do so, simply click on the corresponding button and fill out the contact form that opens. An access code will then be sent to you by email, which you can enter in the corresponding input window within the application.
Installation
Once the download is complete, the PSInstaller will be located in the download folder on your computer, unless otherwise specified:
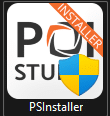
The installation is performed by double-clicking on the installer file. Administrator rights are required to execute the installation. To do this, you must answer Yes to the question Would you like to allow this app to make changes to your device? in the window that opens.
In the PSInstaller window that opens, you can first select the programme language (1). German and English are currently available. Click on Search... (2) to specify the installation path for POIStudio. By default, the programme folder on the system drive (C:\) is selected as the installation path. Click on Install (3) to start the installation process.
Depending on the system, installation takes up to 5 minutes.
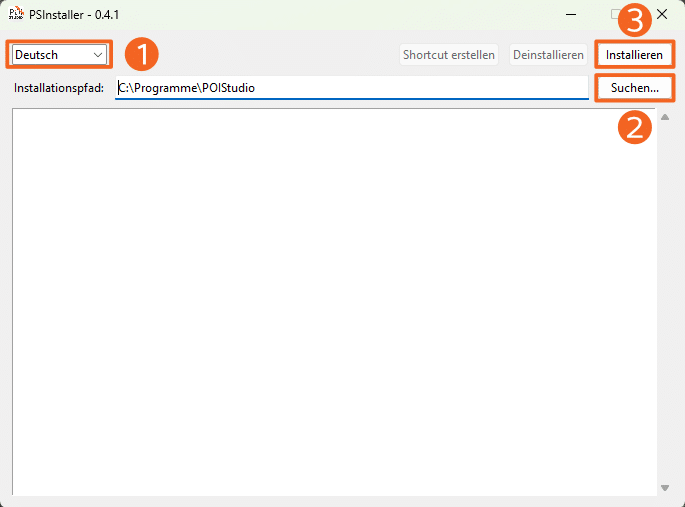
If required, a programme shortcut can be created on the desktop after installation. This completes the installation process.
For detailed instructions on POIStudio, follow this link: POIStudio-Documentation
Activate License
Once the trial licence has been activated, please be sure to contact us. Using the drone ID, we can then permanently activate the licence for POIConnect if you have purchased a drone and software package from our shop. Auch für die Freischaltung von POIStudio sollte nach erfolgter Installation eine Kontaktaufnahme erfolgen, damit wir euch den Zugangscode für eine Dauerlizenz zukommen lassen können.
If required, we are also happy to carry out installation and setup via remote maintenance.
You can request your licence at the following email address: info@thermaldrones.de
Become part of the community
Share image data!
Would you like to support us in the further development of our software? Then share the thermal images you took during your flights with us! We can then use these to train our AI in POIStudio, for example. This will soon make the recognition of living creatures in the field even faster and more reliable.
It also brings us one step closer to our goal of fully automated animal identification in the course of wildlife rescue!
Newsletter
Always stay up to date! Whether it's information about new products or announcements about updates, our newsletter ensures you are always the first to hear about news concerning our company and everything important in the field of thermal imaging drones and wildlife conservation.
Click here to sign up for our free newsletter:
Social Media
Follow us on our social media channels! Here you can gain insights into our work and find information about new products, features and updates relating to our drones and POISuite.
Feel free to link us in your posts if, for example, you are currently using a thermal imaging drone purchased from us or working in the field with POIApp and POIStudio. This really helps us a lot!
You can find our Instagram account here:
You can also subscribe to our YouTube channel. Here you will find regular videos on new features of our software, helpful tutorials and webinar recordings on the use of thermal imaging drones in wildlife/breeding bird conservation and other areas of application.
Your opinion matters!
Feel free to rate us on Google!
Share your experiences with our products – it helps us and others! We would also love to see pictures of your projects showing how you use our products.
You can find the link to the reviews here: